

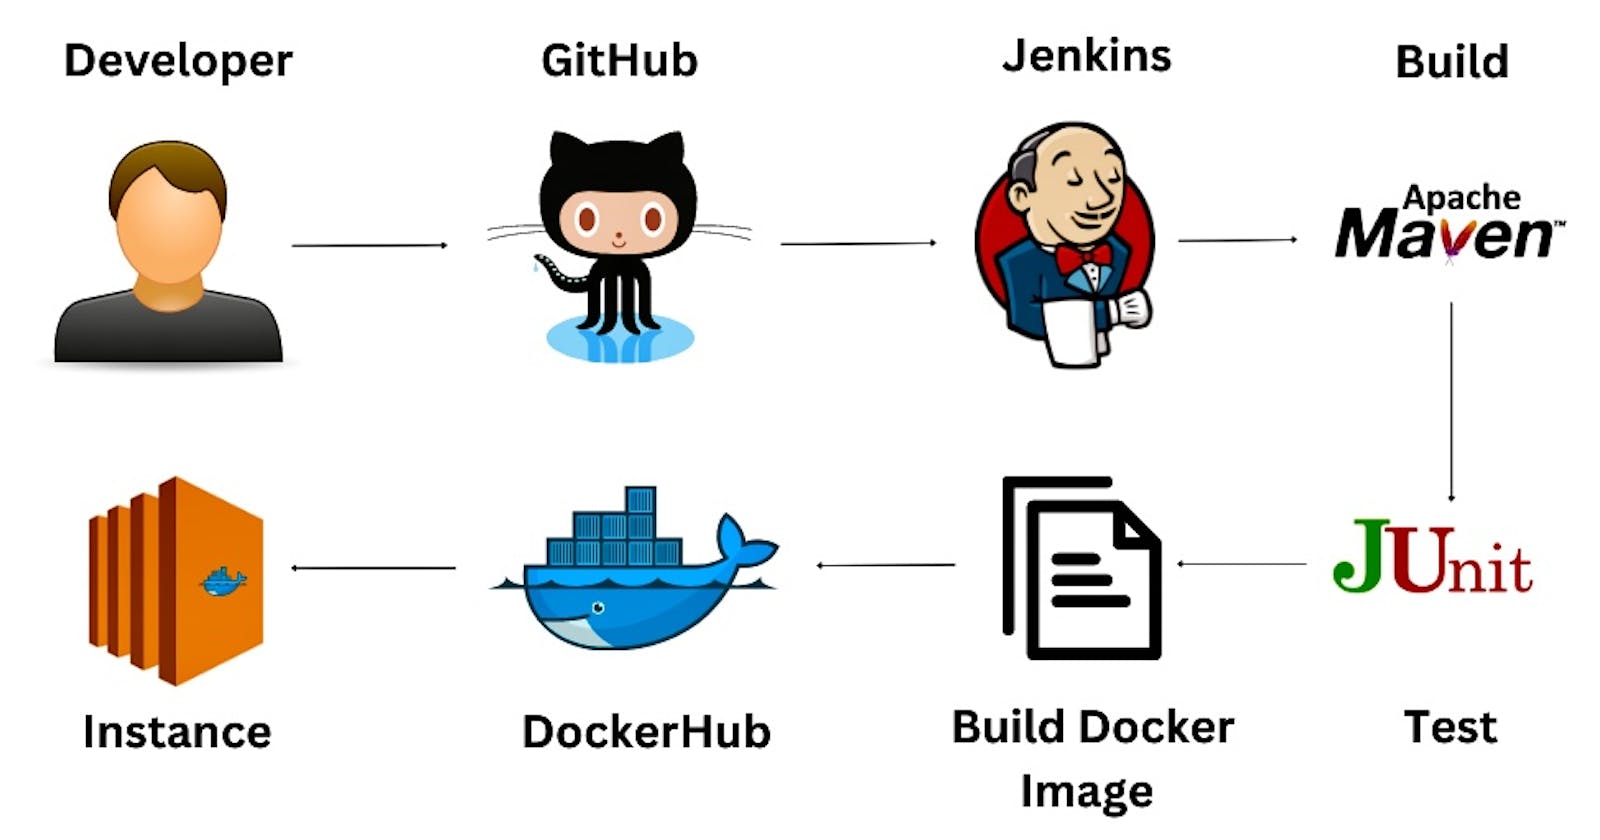


In this article, we will be creating an automated CI/CD pipeline for your Java project using Jenkins, Docker, and AWS. With this pipeline, your project will be automatically built, tested, and deployed to your AWS EC2 instance every time you push code to your GitHub repository.
Prerequisite:
GitHub and DockerHub account
AWS account and knowledge of EC2 Instances
Knowledge of Jenkins, Docker, and Maven
Step 1: Setup Jenkins Server
First set up the Jenkins server to create a pipeline. Launch an EC2 instance and install Java and Jenkins into it. Follow this article to set up a Jenkins server. You need to install Maven and Docker as well. Maven to build the Java project and Docker to build the docker image in Jenkins. SSH into your instance and install maven and Docker using the below commands. For Jenkins, I am using an Ubuntu instance.
# Install Maven in Jenkins
sudo apt-get install maven -y
## Update packages
sudo apt-get update
## Install Docker
sudo apt-get install docker.io -y
## Add Jenkins user to Docker group
sudo usermod -a -G docker jenkins
Set JAVA_HOME and MAVEN_HOME using the below commands. To set the variable permanently, you should add it to the .bashrc file in your home directory.
echo "export JAVA_HOME=/usr/lib/jvm/java-17-openjdk-amd64" >> ~/.bashrc
echo "export MAVEN_HOME=/usr/share/maven" >> ~/.bashrc
1.1. Install Plugins
Install plugins to integrate Jenkins with GitHub, Maven, and EC2. Go to Manage Jenkins, and select Manage plugins. Under available plugins search for the below plugins and Install without restart
Git
Pipeline maven integration
Pipeline stage view
SSH Agent
1.2. Configure Java and Maven in Jenkins
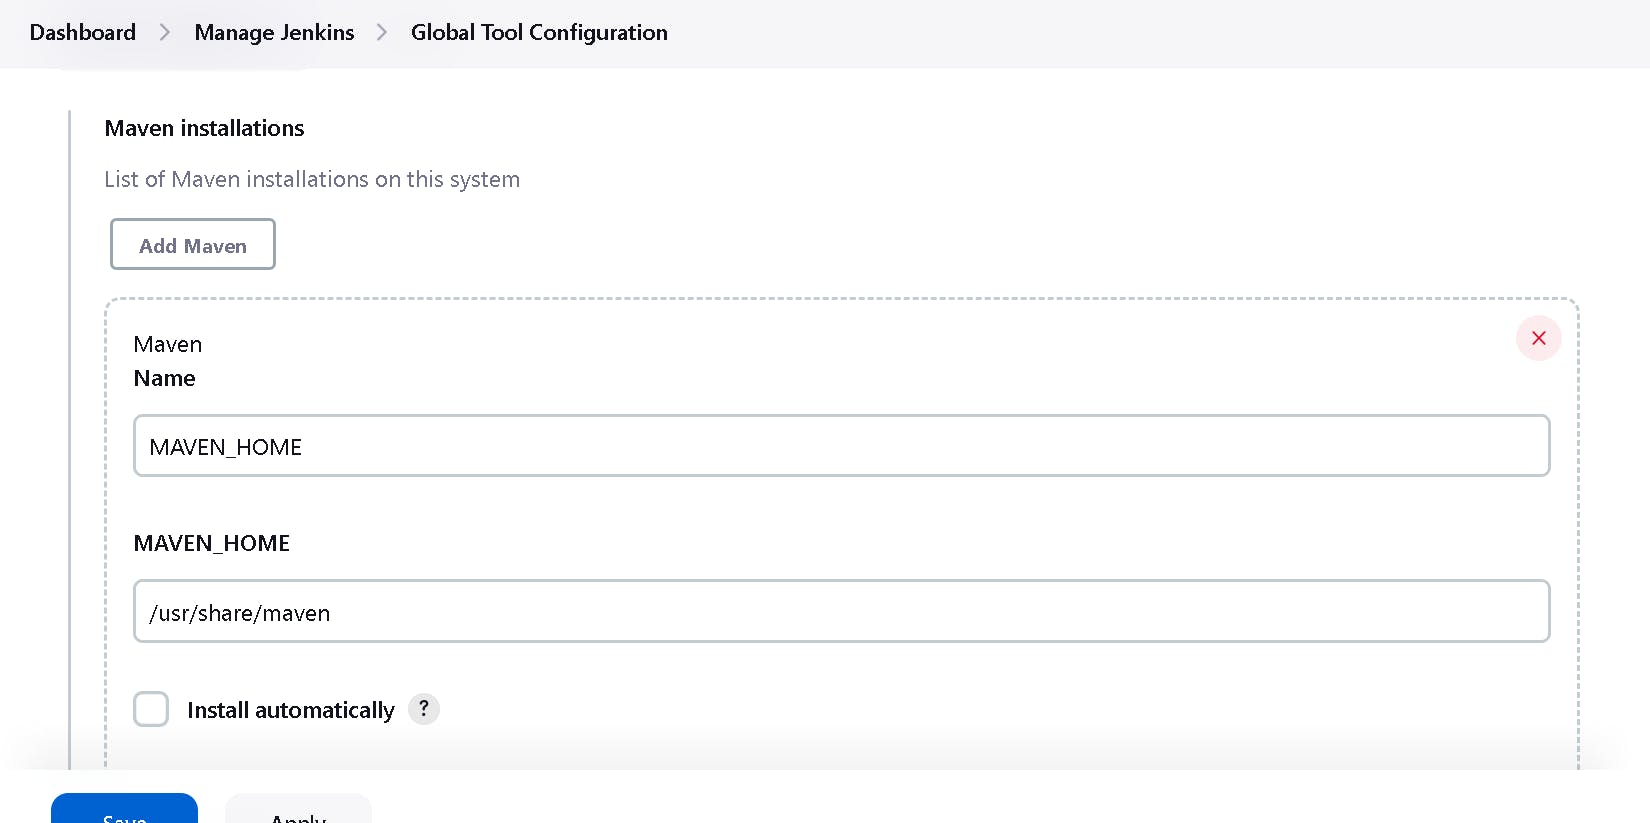
Go to Manage Jenkins, select Global tool configuration, and scroll down to add JDK and Maven path that we exported in the above steps as shown below. Uncheck the Install automatically checkbox, Give Name and Path and click Save.

1.3. Create Webhook
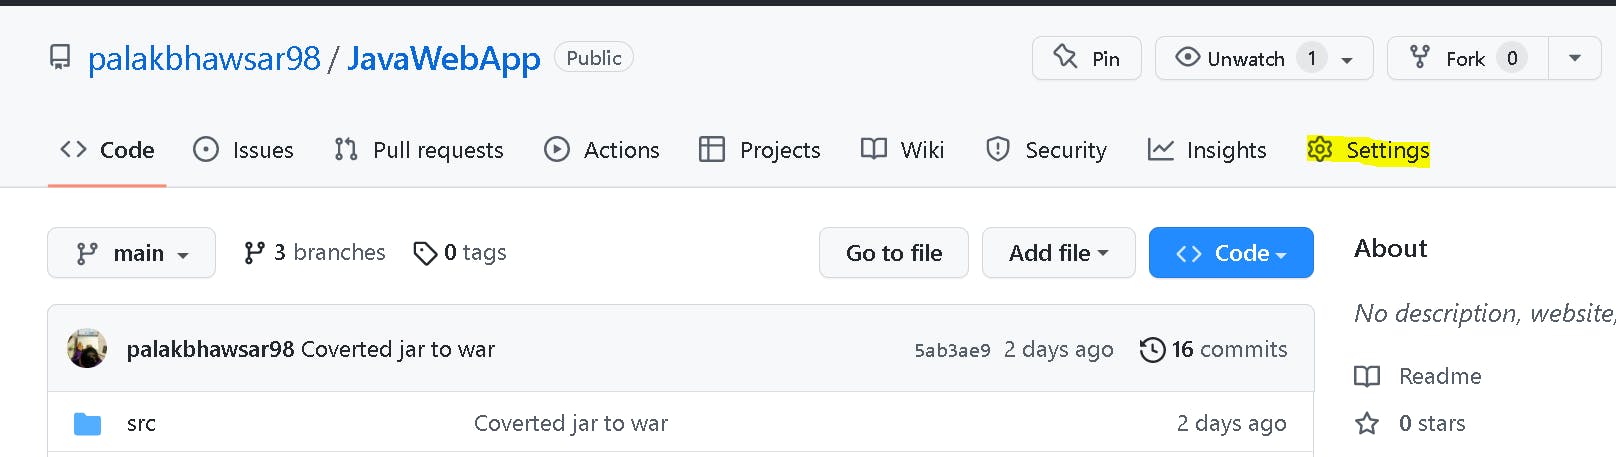
Webhook in Jenkins triggers the pipeline automatically when any changes are done in the GitHub repository like commit and push. Go to Jenkins dashboard and copy the URL in the browser. Now go to GitHub repository settings. In the left pane select Webhooks.
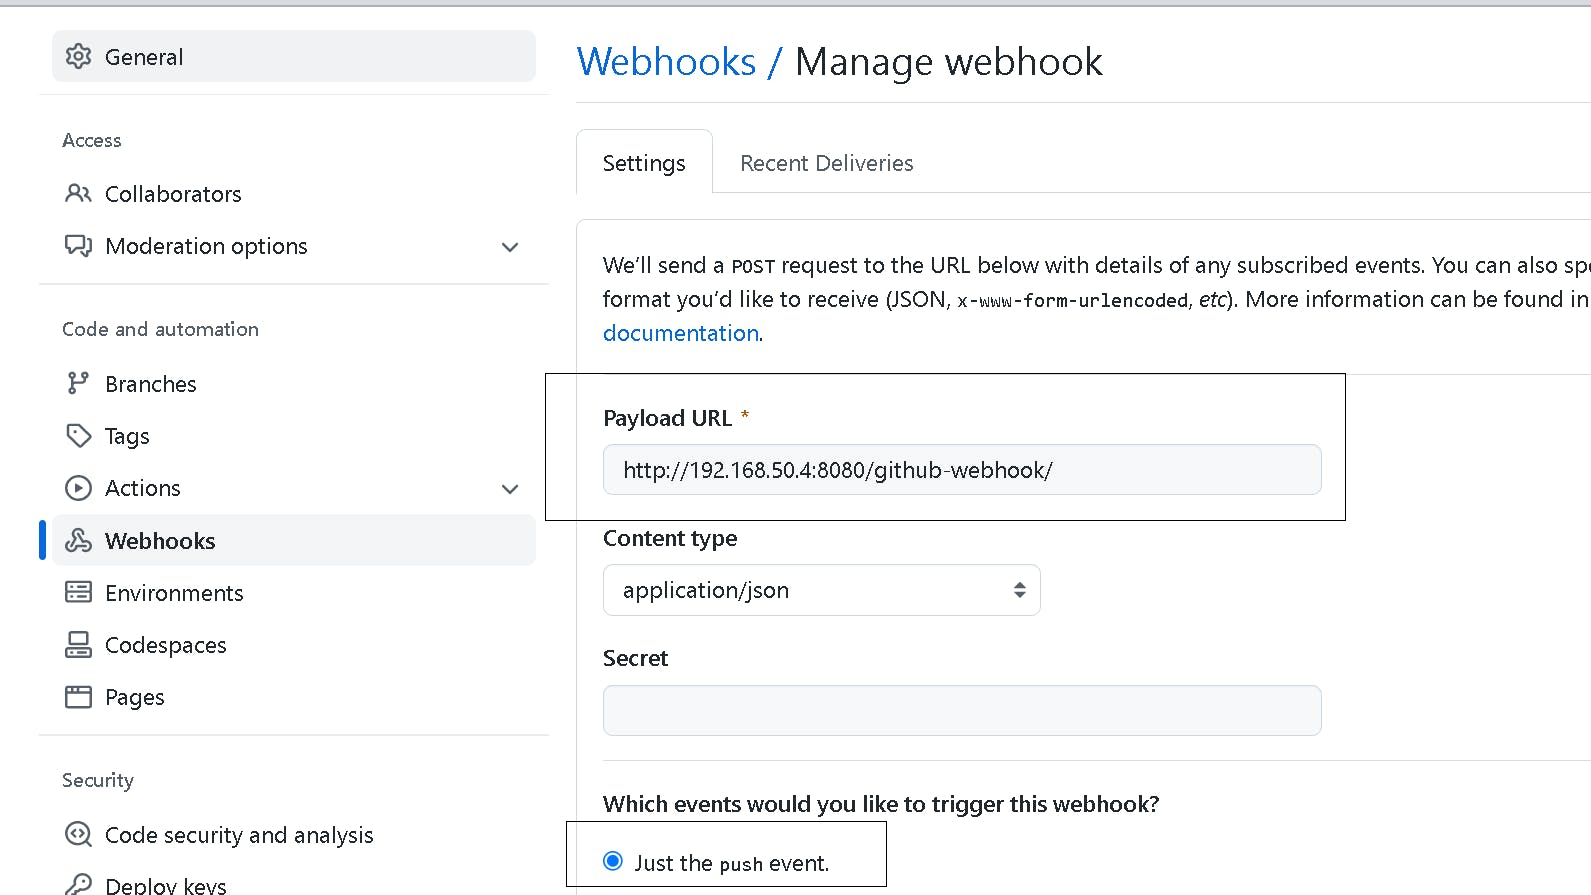
Click Add webhook and paste the Jenkins URL in the Payload URL by appending the URL with /github-webhook/ as shown below. Select the events when you want to trigger the pipeline, I have selected Just the push event and click Add webhook.
Step 2: Add DockerHub credential in Jenkins
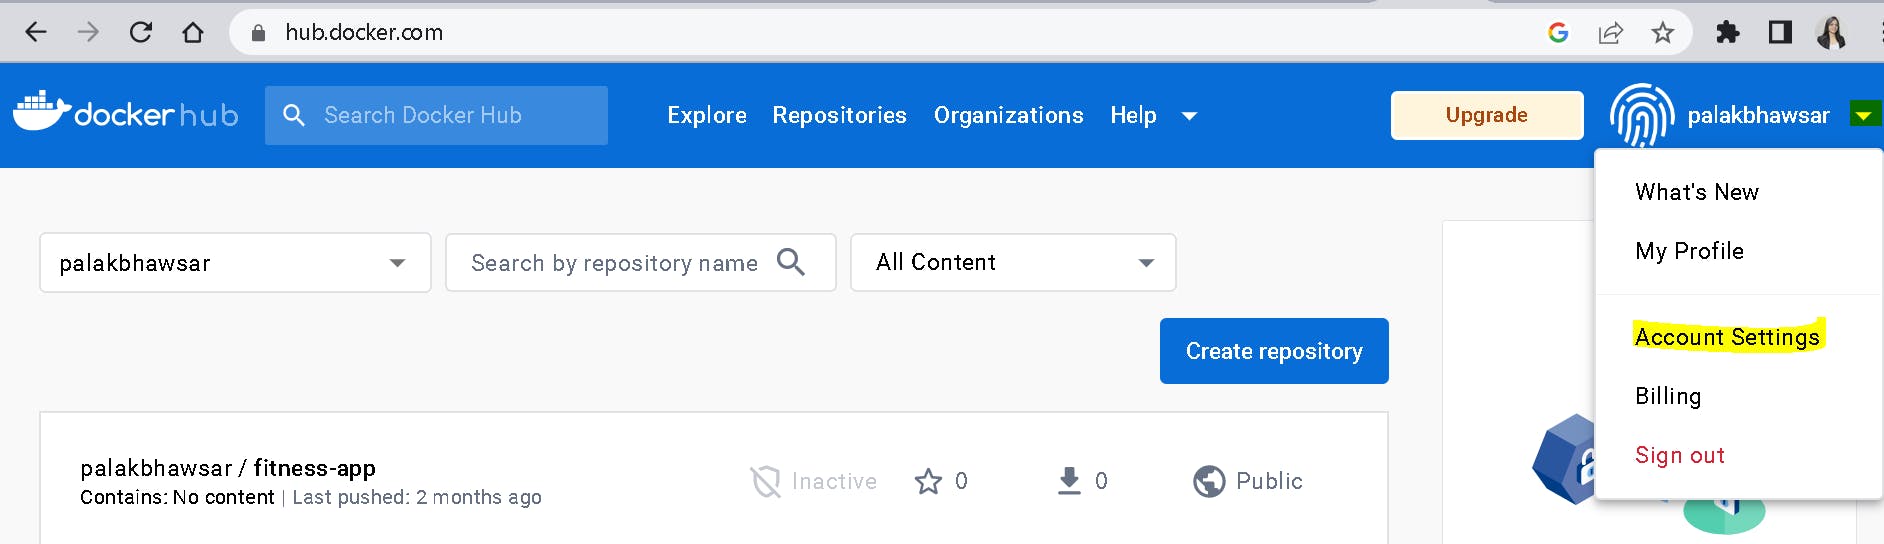
To build and push the Docker image to DockerHub, we need to add docker credentials in Jenkins. Go to your DockerHub account and select the dropdown near username and click Account settings.
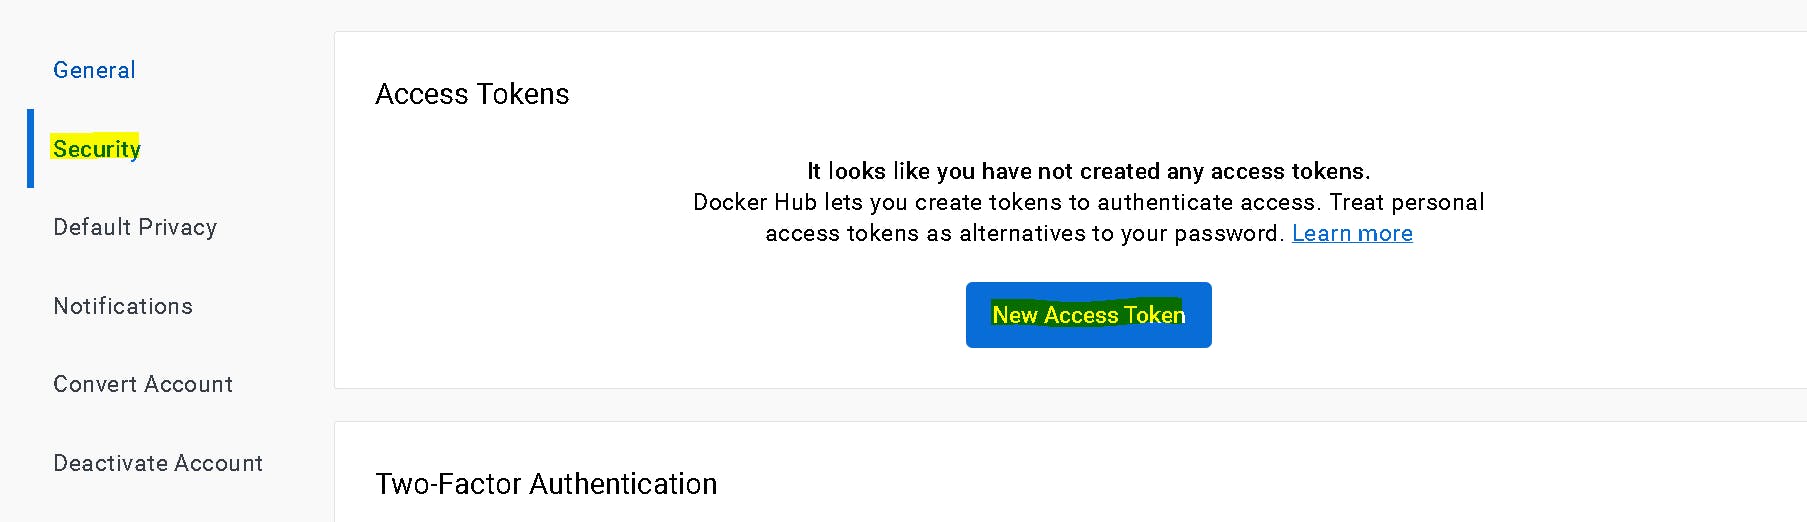
Click Security in the left panel and click New Access Token. Give a description and click Generate. Copy the token and close. Keep this token as we will be adding this to the Jenkins credential in the next steps.
Go to the Jenkins dashboard -> Manage Jenkins -> Manage credentials. Click System -> Global credentials and then click Add credentials. Select the kind as Username and Password and enter your DockerHub username and enter the token in Password that we have generated in dockerHub. Give the ID and description of your choice but remember this ID as we will be using it in Jenkinsfile and click Create.

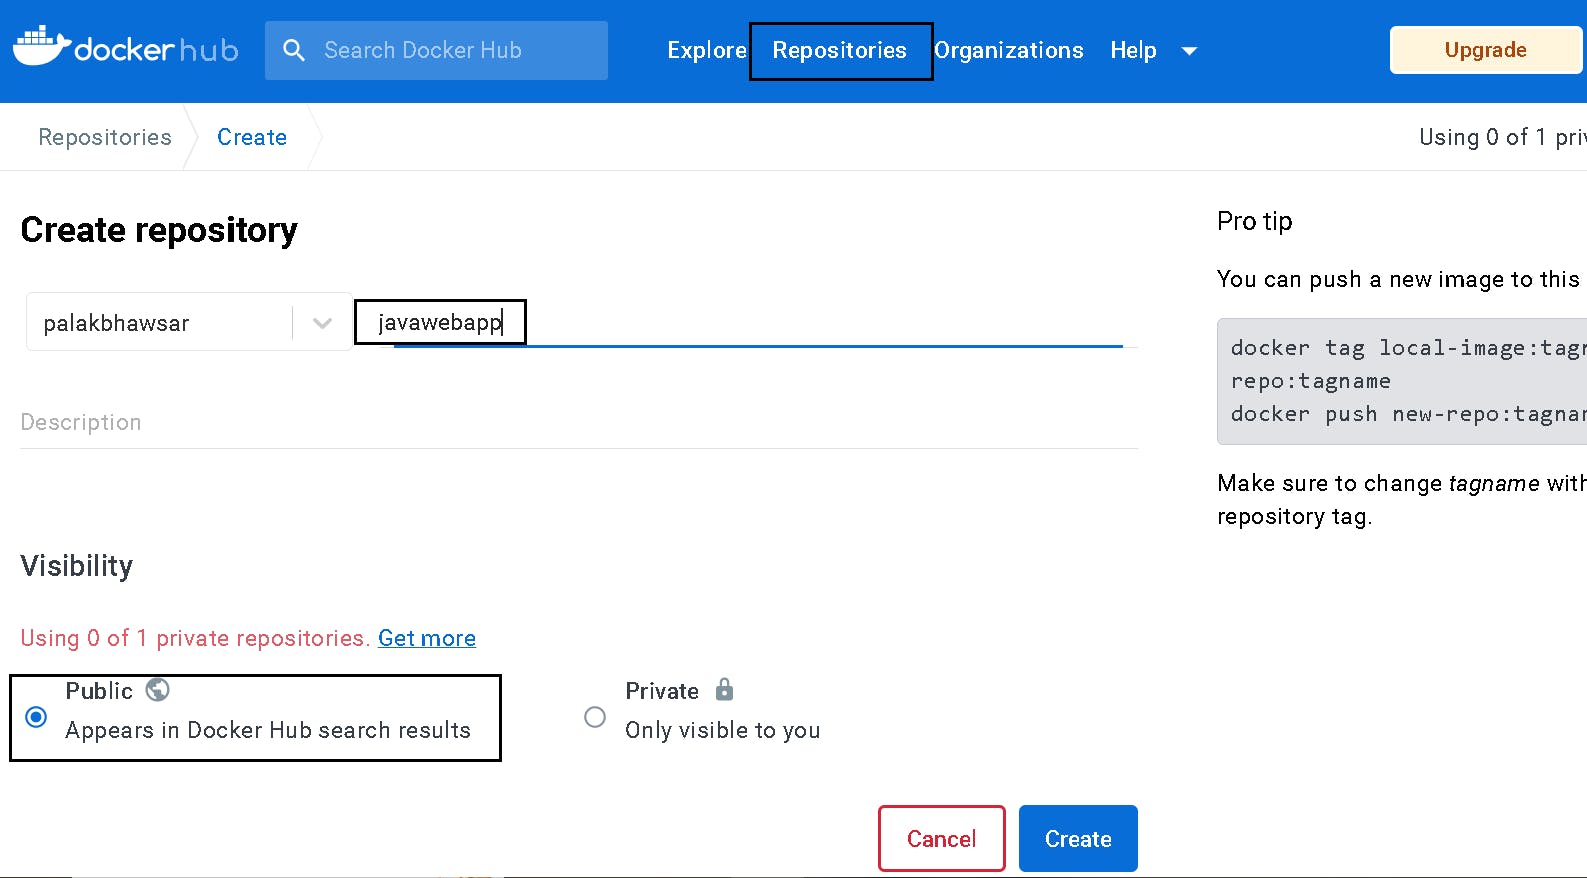
2.1. Create a Repository in DockerHub
Go to the DockerHub registry, select Repositories and click Create repository. Give a name to the repository and select visibility as Public and click Create.
Step 3: Setup Docker in EC2 Instance
Launch an EC2 instance and install docker into it. Open port 22 to SSH into the instance and open port 8081 as I will be exposing my Java application to port 8081. After successful deployment, you will be able to access the application in the browser using http://PUBLIC_IP:8081/hello
I have launched the Amazon Linux instance and setup Docker using the below commands:
# Update packages
sudo yum update
# Install Docker
sudo yum install docker
# Add ec2-user to Docer group
sudo usermod -a -G docker ec2-user
# Enable docker service at AMI boot time
sudo systemctl enable docker.service
# Start the Docker service
sudo systemctl start docker.service
3.1. Add EC2 credentials in Jenkins
Go to Jenkins Dashboard -> Manage Jenkins -> Manage Credentials. Click on Global and Add Credentials and select SSH Username with the private key under Kind. Enter the ID and Description of your choice. Make note of this ID as we will be using it in Jenkinsfile. Enter the username of the EC2 instance that you have launched. For the Amazon Linux instance, the username is ec2-user. Select Enter directly and click Add and copy-paste the private key that you have created while launching an instance and click Create.

Step 4: Write Jenkinsfile and Dockerfile
Write Jenkinsfile with all the below steps to fetch, build, test and deploy Java application. Remember to add the below Jenkinsfile in the root directory of your project in GitHub.
pipeline {
  agent any

  environment {
    DOCKERHUB_CREDENTIALS = credentials('docker-hub-cred')
    REMOTE_SERVER = 'your-remote-server-ip'
    REMOTE_USER = 'your-remote-server-user'
  }

  // Fetch code from GitHub

  stages {
    stage('checkout') {
      steps {
        git branch: 'main', url: 'https://github.com/palakbhawsar98/JavaWebApp'

      }
    }

   // Build Java application

    stage('Maven Build') {
      steps {
        sh 'mvn clean install'
      }

     // Post building archive Java application

      post {
        success {
          archiveArtifacts artifacts: '**/target/*.jar'
        }
      }
    }

  // Test Java application

    stage('Maven Test') {
      steps {
        sh 'mvn test'
      }
    }

   // Build docker image in Jenkins

    stage('Build Docker Image') {

      steps {
        sh 'docker build -t javawebapp:latest .'
        sh 'docker tag javawebapp palakbhawsar/javawebapp:latest'
      }
    }

   // Login to DockerHub before pushing docker Image

    stage('Login to DockerHub') {
      steps {
        sh 'echo $DOCKERHUB_CREDENTIALS_PSW | docker login -u    $DOCKERHUB_CREDENTIALS_USR --password-stdin'
      }
    }

   // Push image to DockerHub registry

    stage('Push Image to dockerHUb') {
      steps {
        sh 'docker push palakbhawsar/javawebapp:latest'
      }
      post {
        always {
          sh 'docker logout'
        }
      }

    }

   // Pull docker image from DockerHub and run in EC2 instance

    stage('Deploy Docker image to AWS instance') {
      steps {
        script {
          sshagent(credentials: ['awscred']) {
          sh "ssh -o StrictHostKeyChecking=no ${REMOTE_USER}@${REMOTE_SERVER} 'docker stop javaApp || true && docker rm javaApp || true'"
      sh "ssh -o StrictHostKeyChecking=no ${REMOTE_USER}@${REMOTE_SERVER} 'docker pull palakbhawsar/javawebapp'"
          sh "ssh -o StrictHostKeyChecking=no ${REMOTE_USER}@${REMOTE_SERVER} 'docker run --name javaApp -d -p 8081:8081 palakbhawsar/javawebapp'"
          }
        }
      }
    }
  }
}
Also, write Dockerfile with the instructions to build the Java project and keep this file in the root directory of the project.
#Define your base image
FROM eclipse-temurin:17-jdk-focal

#Maintainer of this image
LABEL maintainer="Palak Bhawsar"

#Copying Jar file from target folder
COPY target/web-services.jar web-services.jar

#Expose app to outer world on this port
EXPOSE 8081

#Run executable with this command
ENTRYPOINT ["java", "-jar", "web-services.jar"]
Step 5: Create a Jenkins pipeline
Go to Jenkins Dashboard click New Item -> Give a name to the pipeline -> Select Pipeline -> Click Ok

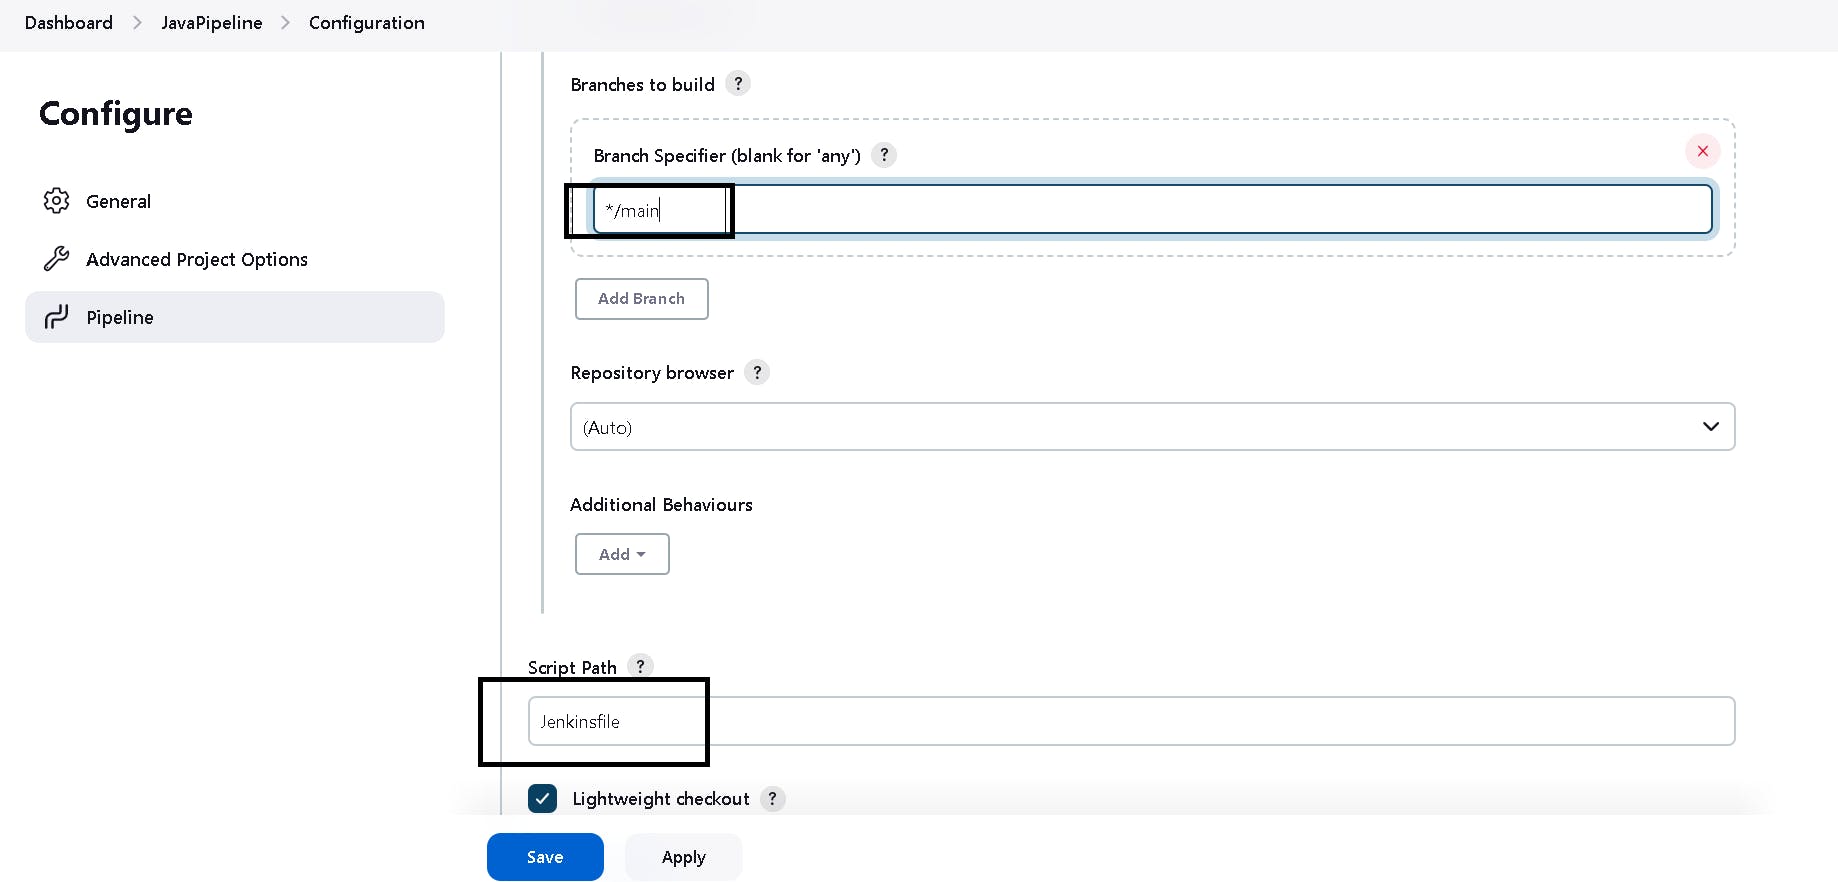
Add Description of your pipeline -> Build Triggers -> GitHub hook trigger for GITScm polling. Scroll to the last in the Pipeline section and from the dropdown select Pipeline script from SCM. Under SCM, select Git and enter your GitHub project repository URL. If your GitHub repository is private then add credentials.
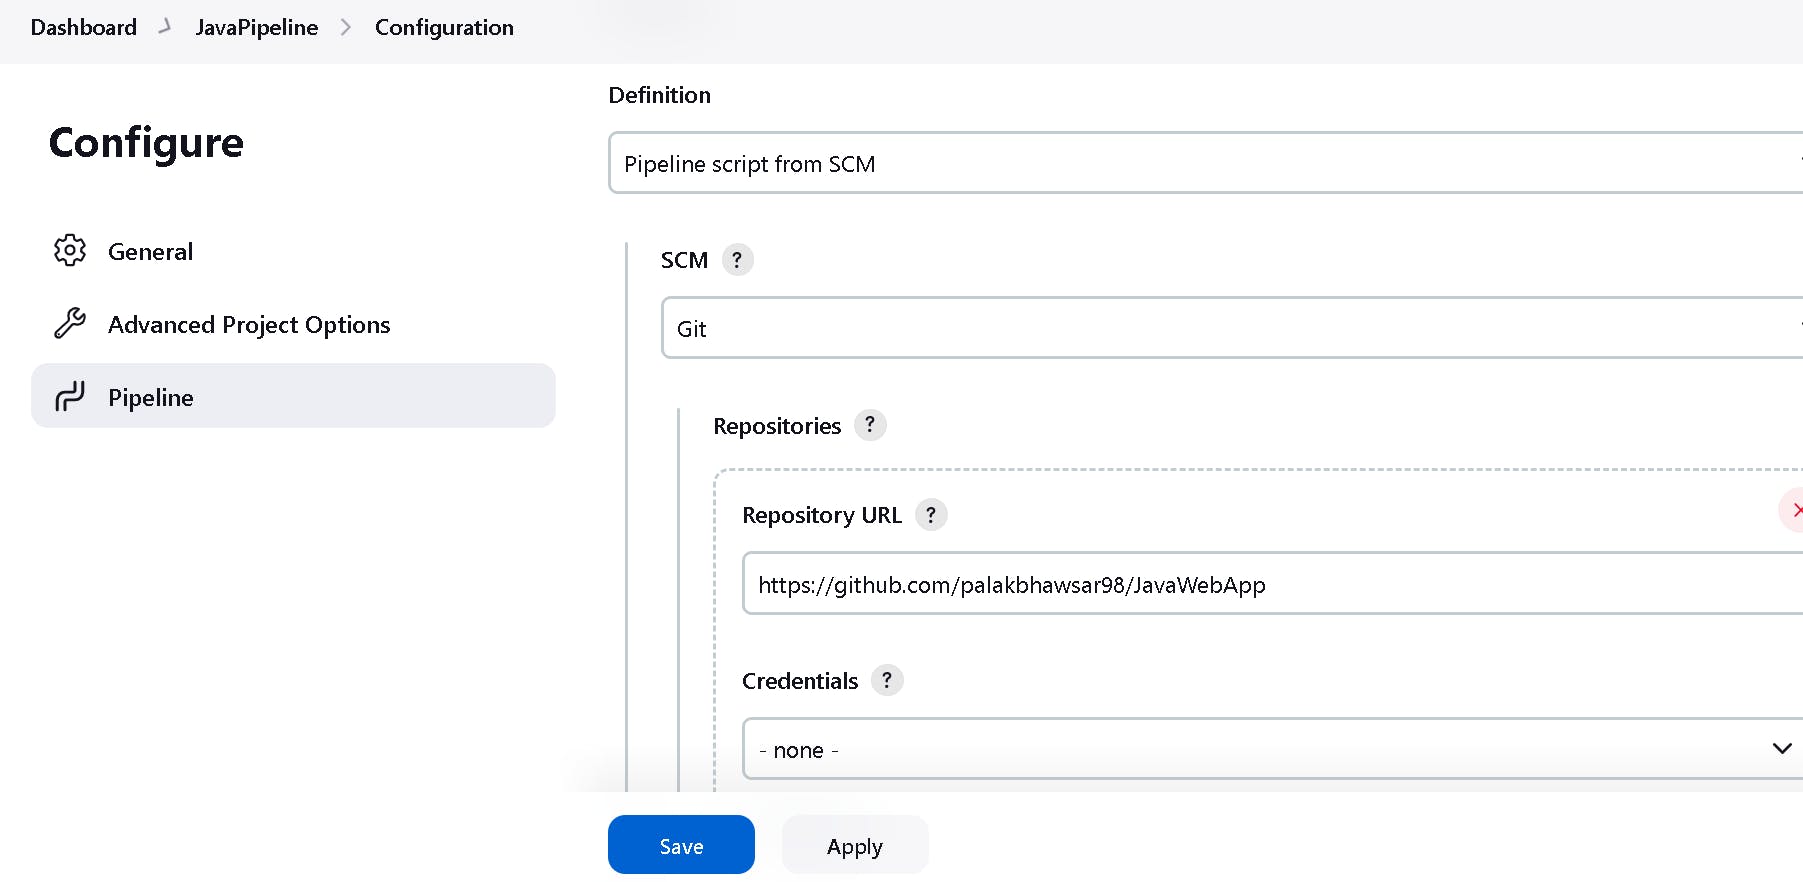
Also, enter the branch name in Branches to build and the Jenkinsfile name in Script Path and click Save. Finally, Click Build Now to run the pipeline.
The Jenkins pipeline run successfully and the docker image got deployed to the EC2 instance.
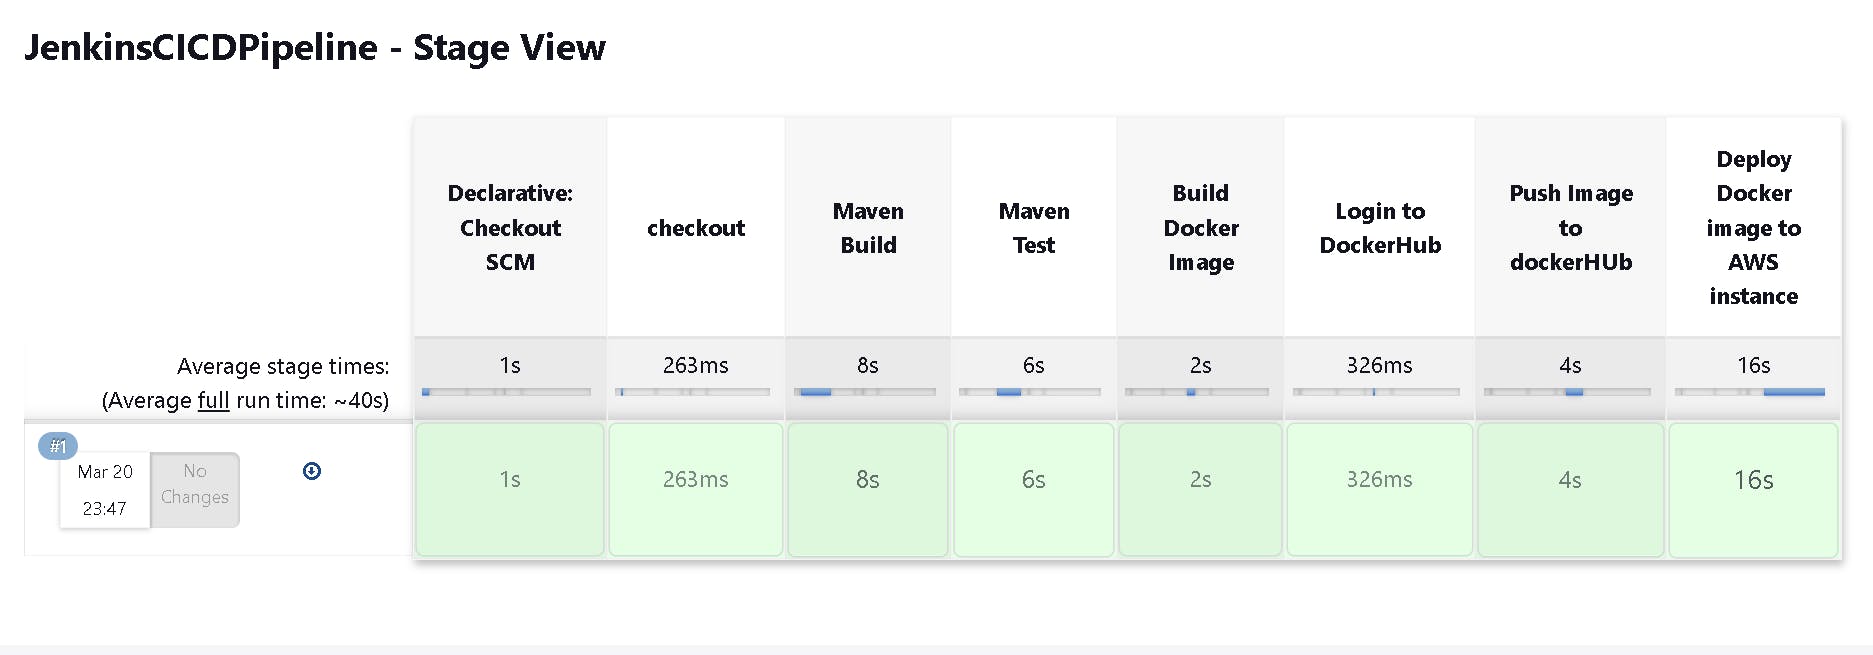
Access your Java Application in the browser using the public IP of the AWS instance at port 8081

Congratulations🥳🥳, we have successfully created an Automated CI/CD pipeline for Java application.
If you face any issues contact me on my socials 👉 Contact me
Thank You
Palak Bhawsar ✨