

Create free tier AWS account, create IAM user and set CloudWatch alarm for billing


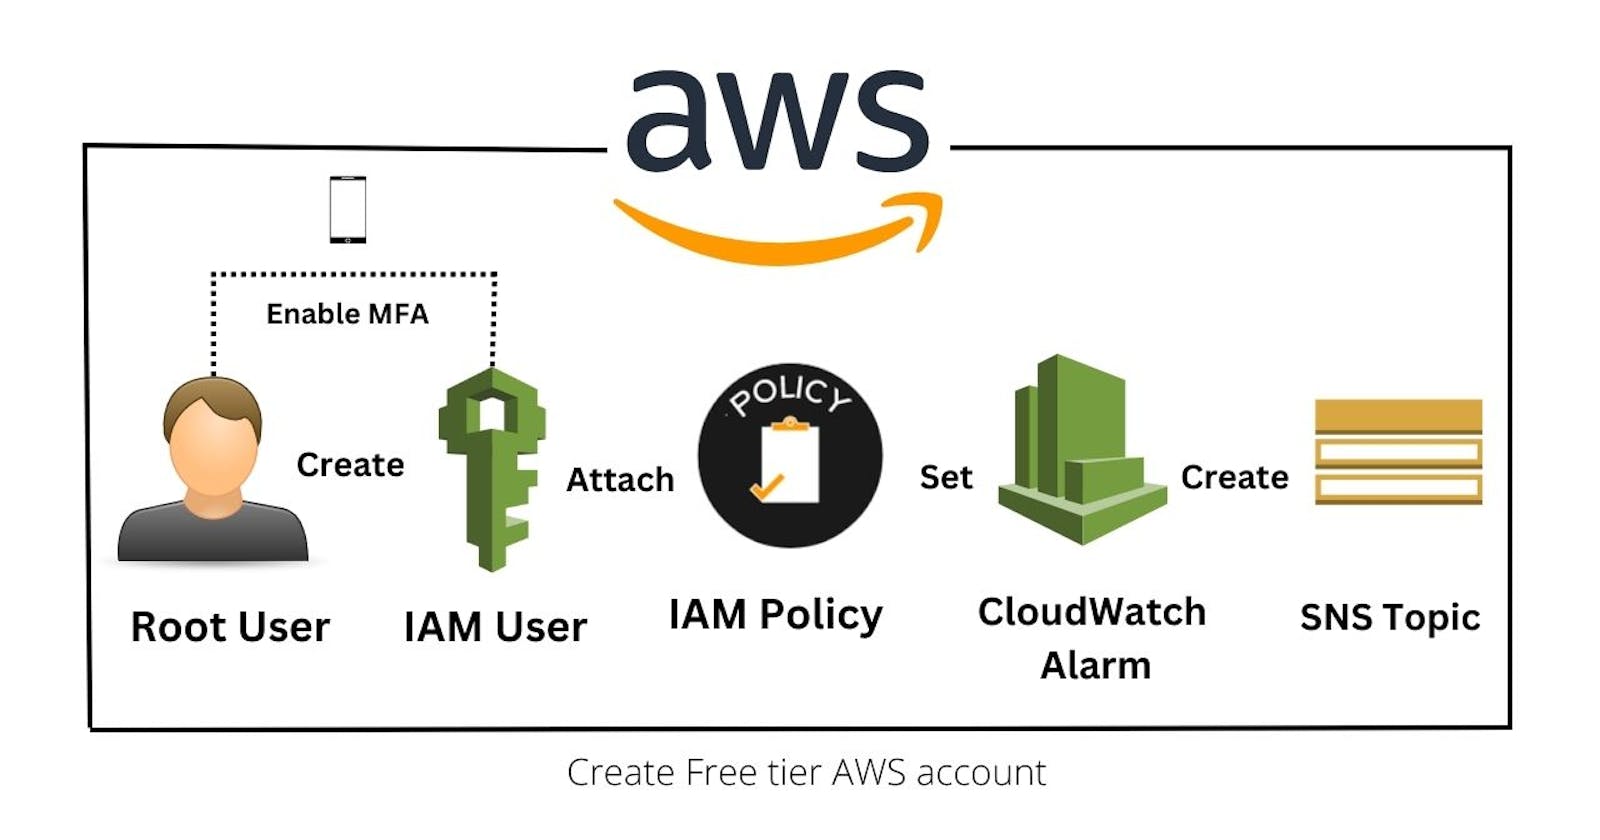
In this article, we will see how to create a free tier AWS account step by step. We will create the IAM user and enable the Multi-factor Authentication (MFA) for the root user and IAM user to secure your account. Also to safeguard our AWS account from over-expenditure we will set billing alarms and create an SNS topic that will send you an email notification if you go beyond a certain limit.
Let's first understand some of these terminologies:
Amazon Web Services (AWS): AWS is a cloud provider platform that provides computing, networking and storage services on demand that scales easily.
Root User: The root user is the account owner and is created when the AWS account is created. This is the default user and should not be used or shared.
IAM User: An IAM user is a resource to give access to your AWS account to specific users and provides them specific permissions to access resources in your AWS account.
IAM Policy: IAM policies define permissions for actions that users or groups can perform in an AWS account. Users and groups are assigned JSON documents called policies.
AWS CloudWatch alarm: CloudWatch alarm helps you to watch CloudWatch metrics and to receive notifications when the metrics fall outside of the levels (high or low thresholds) that you configure. In our case, we are setting a CloudWatch alarm to monitor the billing threshold.
Simple Notification Service (SNS): SNS is a managed service that provides message delivery from publishers to subscribers. Publishers communicate asynchronously with subscribers by sending messages to a topic. SNS topic is a logical access point that acts as a communication channel.
Step 1: Create an AWS account
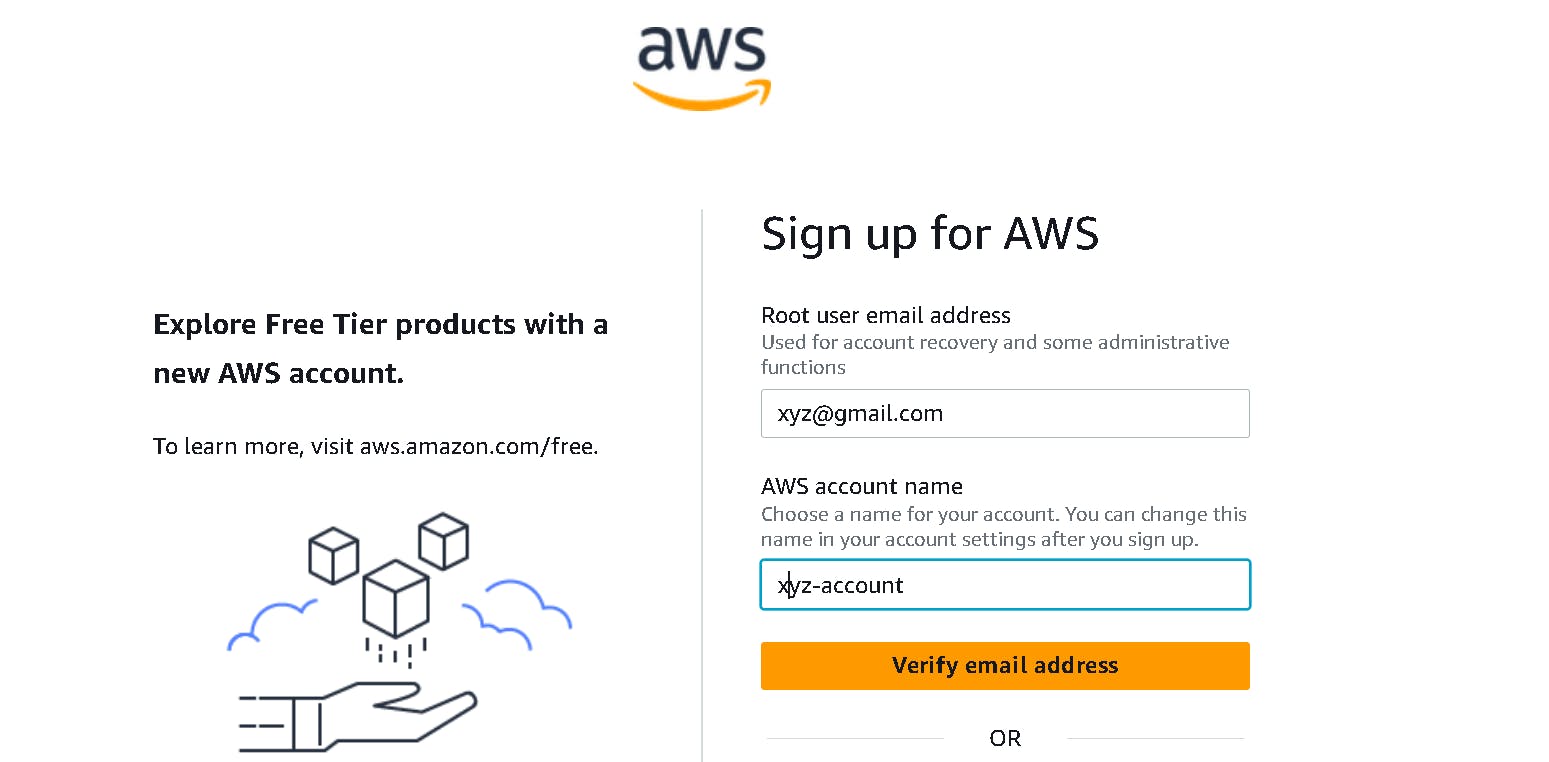
Go to the below AWS site to create a free tier account and click Create a Free Account button.

Enter your email address and give any name to your AWS account. You can also change this name later. Click Verify email address. You will get the verification code in your email. Enter the code and click Verify.
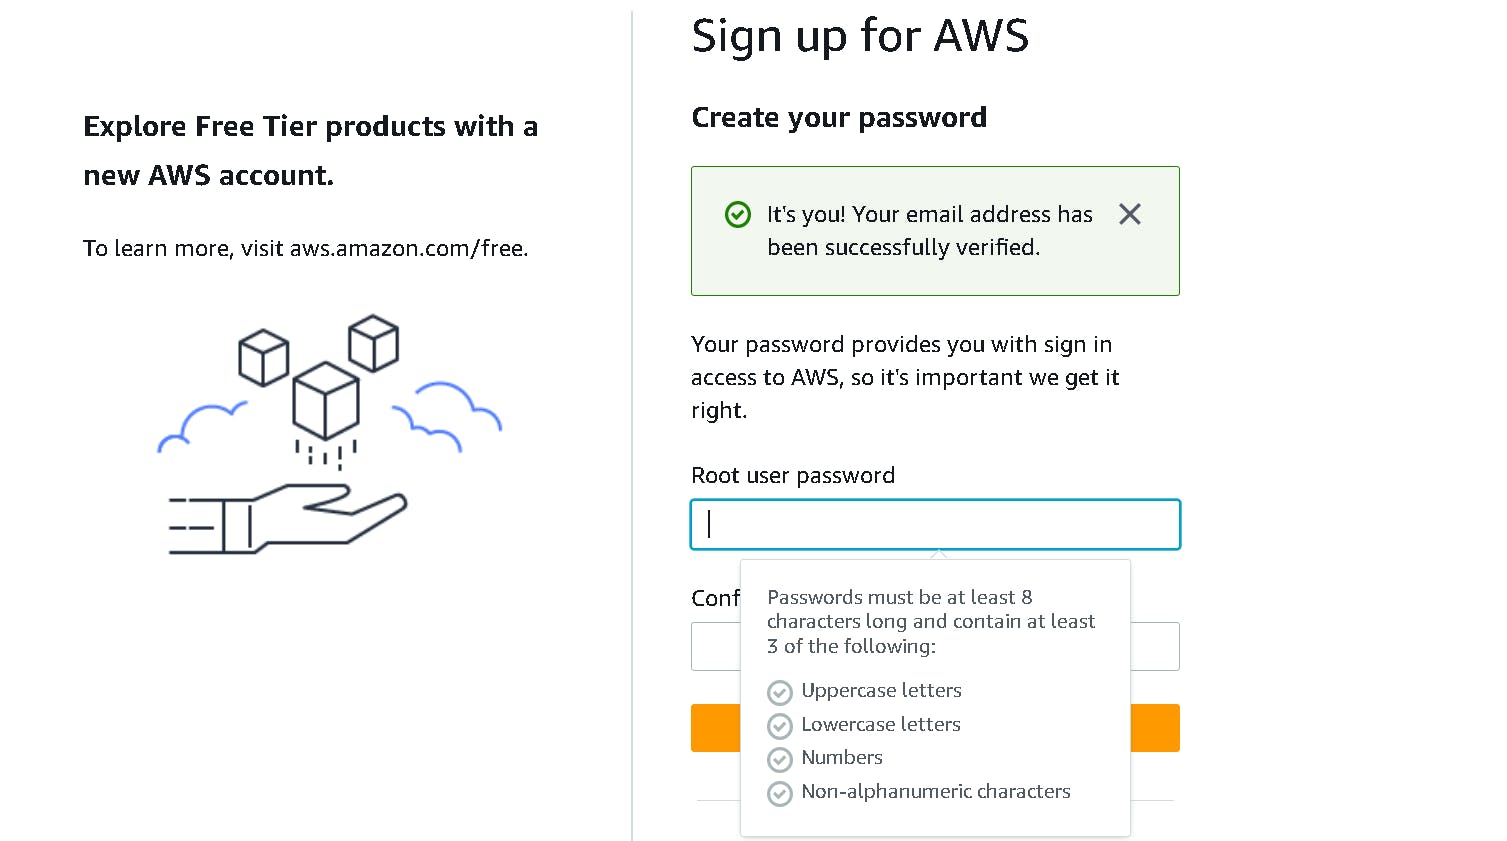
Create a root user password. Make sure that you create a strong password containing more than 8 digits then click Continue.
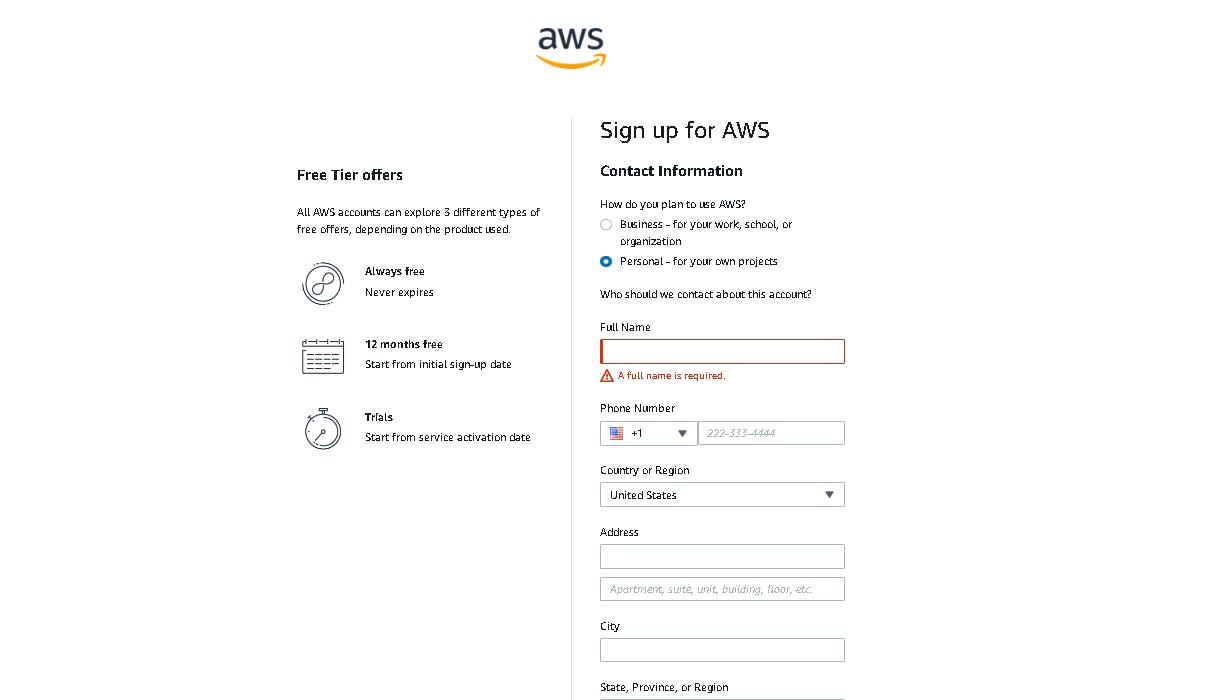
In the next step, select Personal - for your own projects. Enter your Full Name, Phone Number, Country or Region, and your address details. Click the checkbox after reading AWS Customer Agreement and click continue to the next steps.
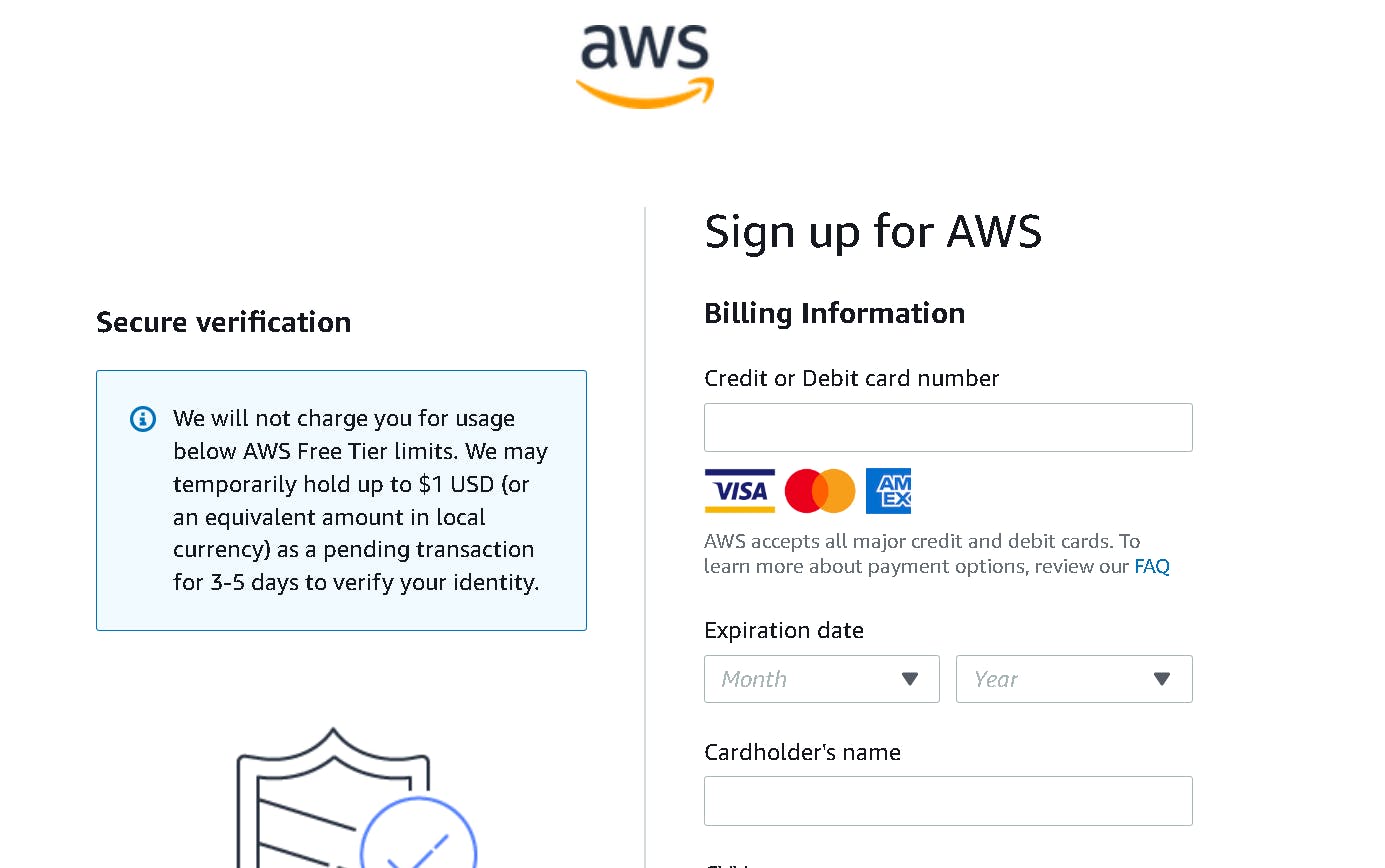
In the next step, enter your Credit or Debit card details. It will deduct a minimal amount just for verification purposes and click continue. On the next page, it will ask for the OTP and Rs. 2.00 will get deducted from your account. Finally, enter the OTP and click on Submit button.
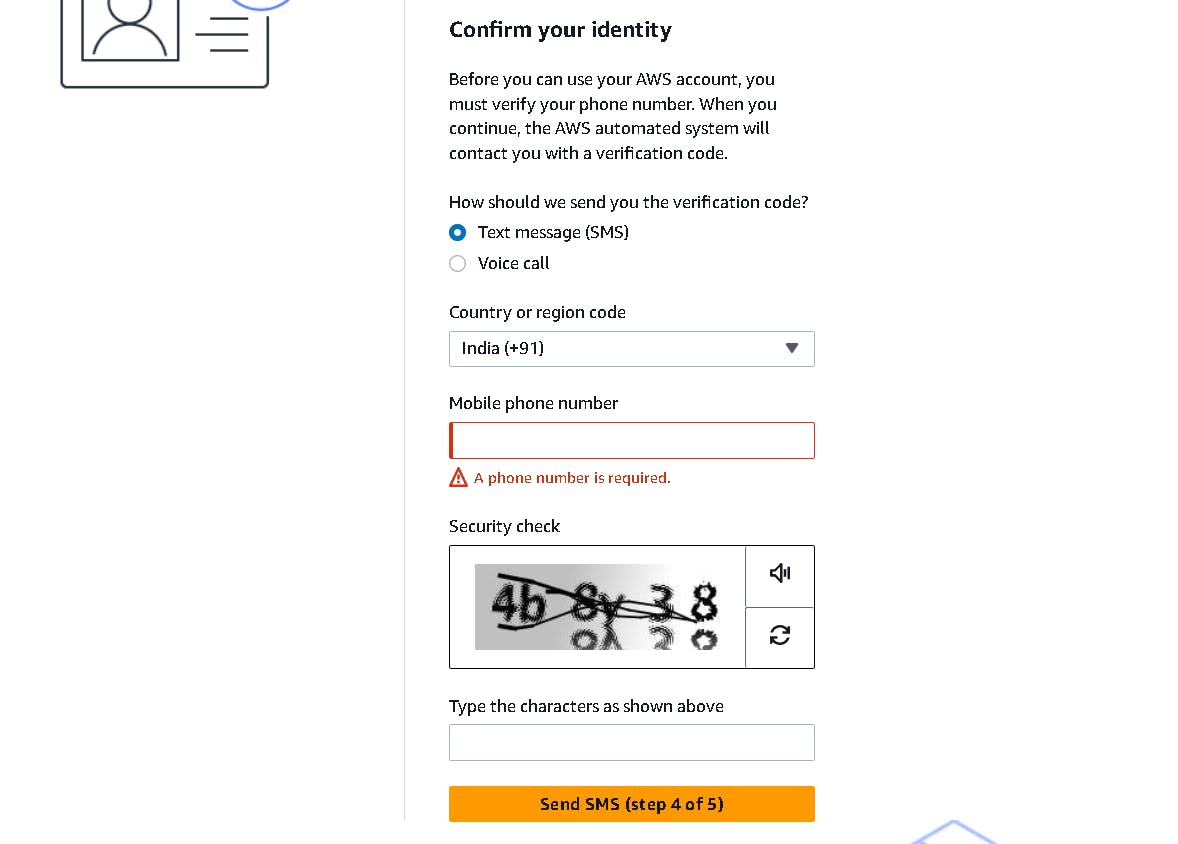
Confirm your Identity on the next page by verifying your Phone number. This phone number will be used to send you verification codes in the future. Select text message and enter your phone number, do the security check and click Send SMS. Enter the OTP sent to your phone number.
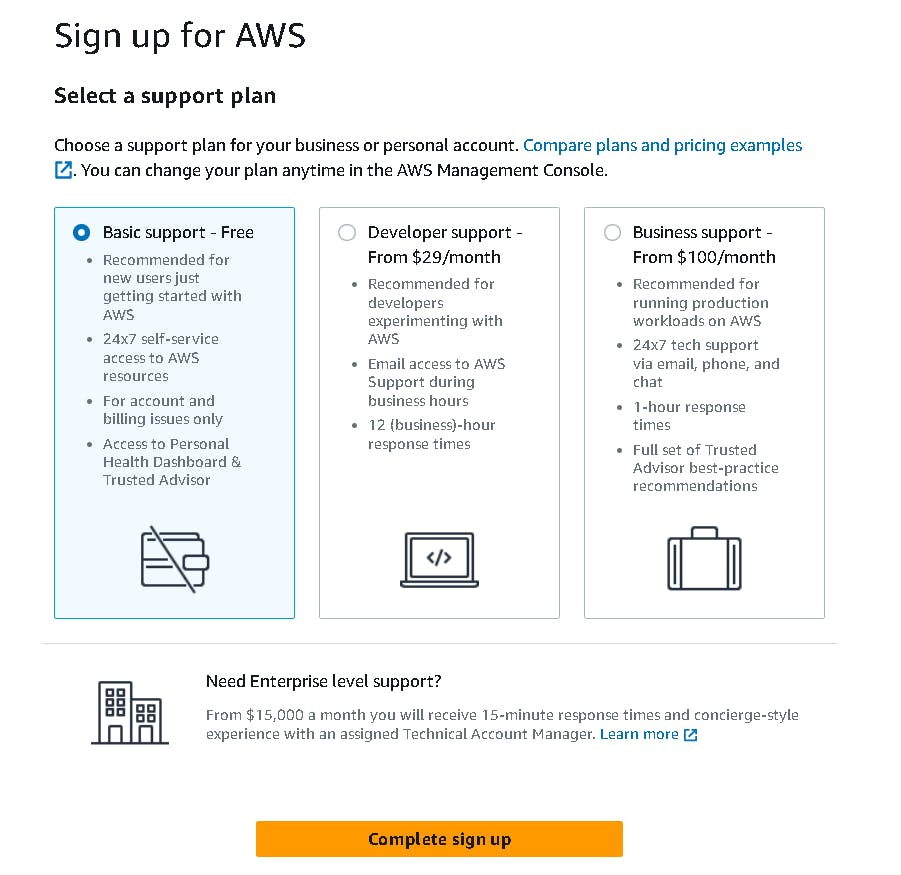
Choose a Basic support-Free plan which comes under the free tier and finally click on Complete Sign up.
Go to the AWS management console and select sign in to the console and sign in using the email and password that we set up previously for the root user.
The root user has access to every AWS service and resource in an account. If the credentials for the root account are stolen, it may lead to unnecessary costs in your account therefore it's recommended to not use a root account and instead create an IAM user.
2. Enable Multi-factor authentication
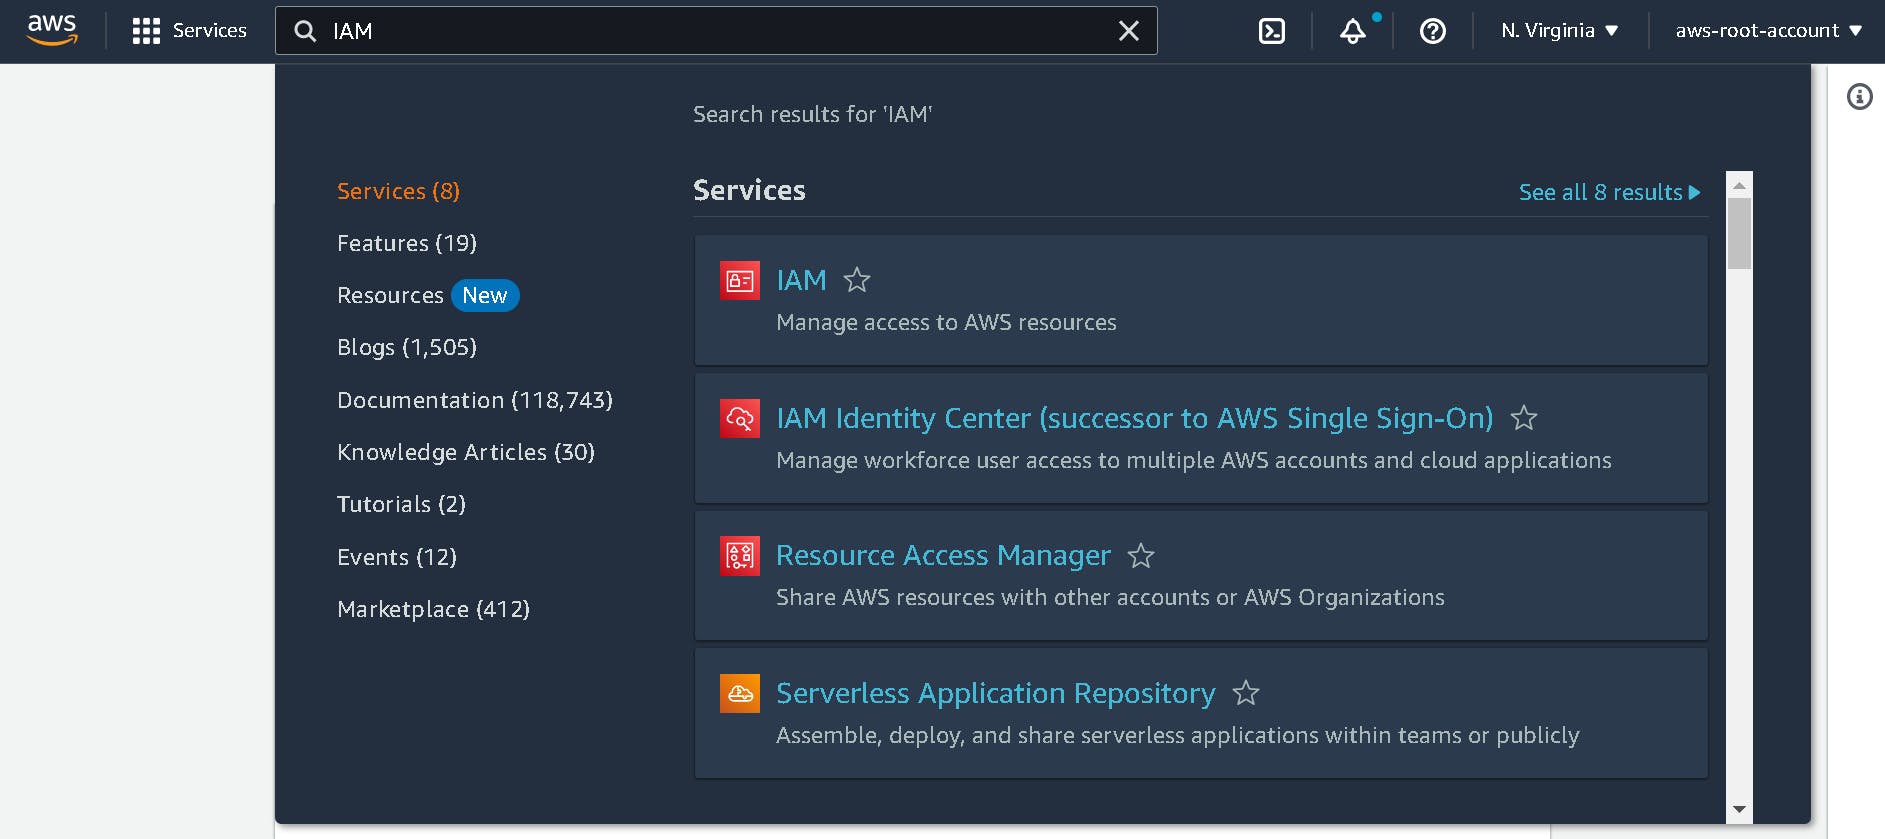
Search for IAM in the services section and select IAM. The IAM dashboard will appear, in the security recommendation click Add MFA and then Assign MFA on the next page.
Give a name to the Device name box and select an Authenticator app and click next. Download the Google Authenticator app on your phone. It will generate a 6 digits verification code that you will have to enter whenever you log in as a root user.
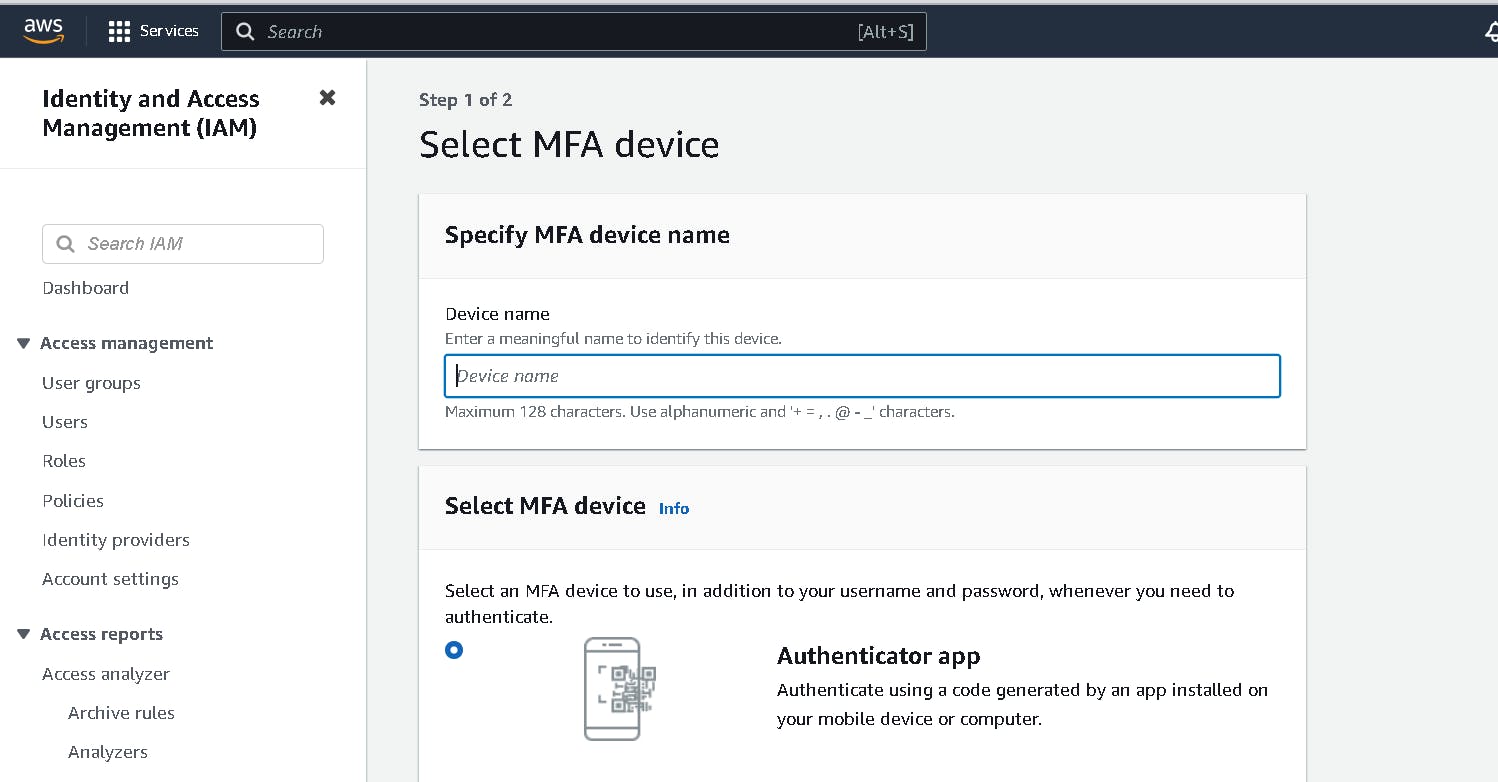
Click on the Show QR code on the next page. Open the Google Authenticator app on your phone and click on the '+' button and scan the QR code visible on your AWS account screen. Enter the 6 digits code from the app in the box MFA code 1. Wait for 30 seconds and enter the next code in the box MFA code 2 and click Add MFA.
Multi-factor authentication is enabled for your root account.
3. Create IAM User
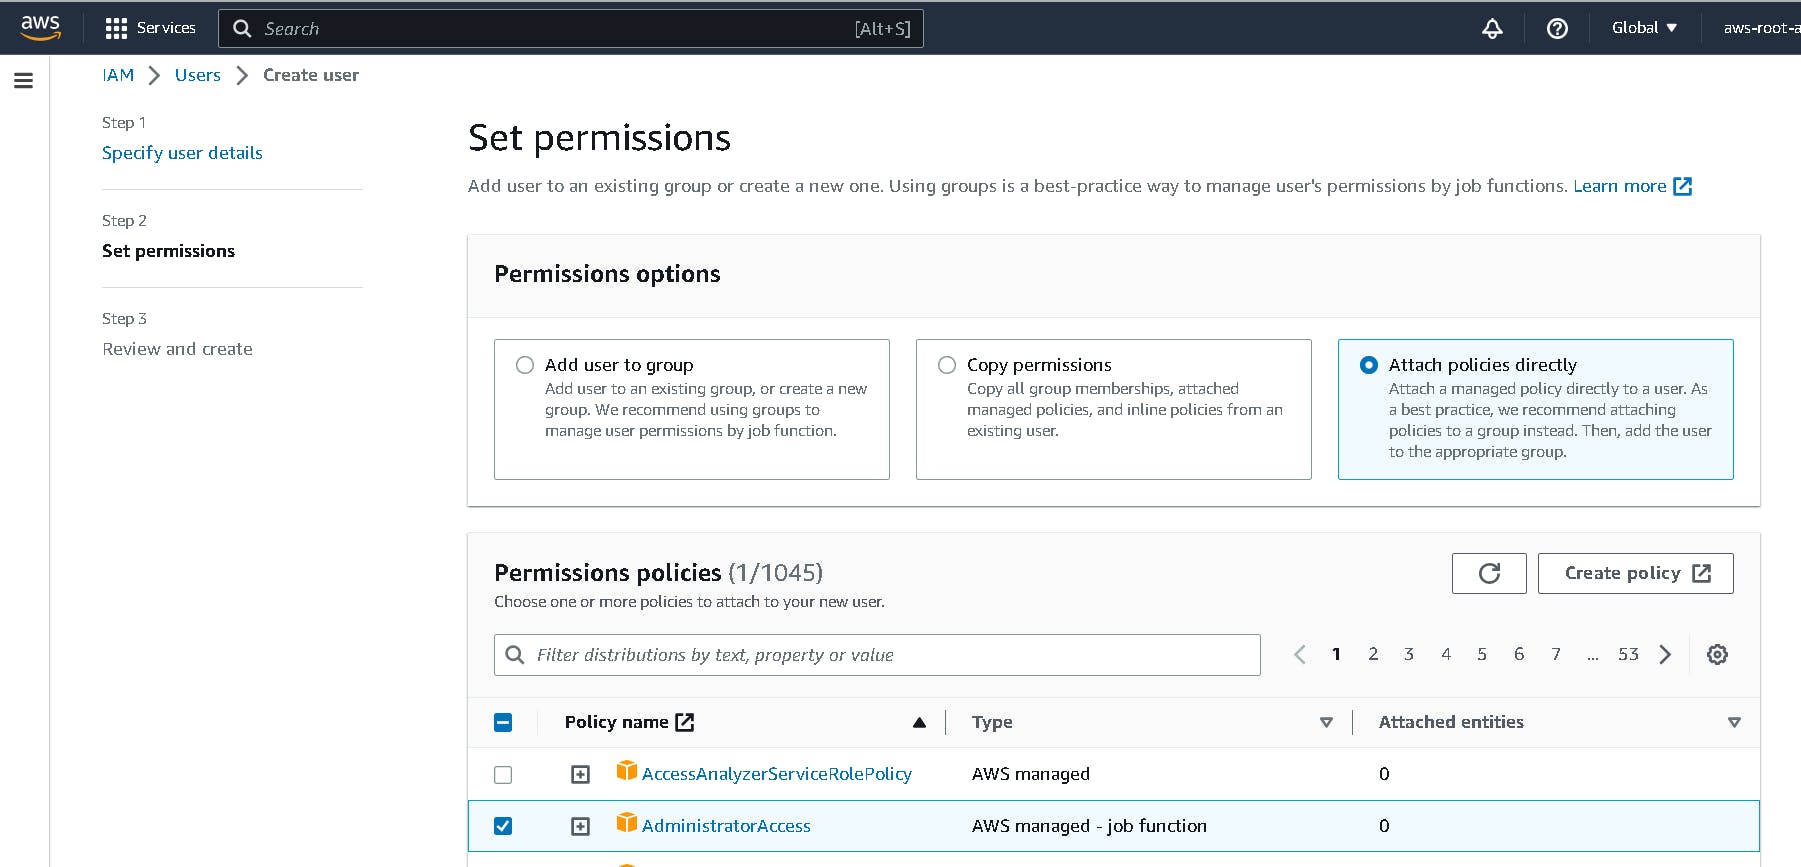
Go to Users in the left panel and click Add users. Give the name to the user and click next. This user will not have any permission by default. Attach the policy to this user to access AWS resources. Select Attach policies directly and AdministratorAccess for this user and click next and Create user. The user is created successfully.
4. Create credentials for IAM user
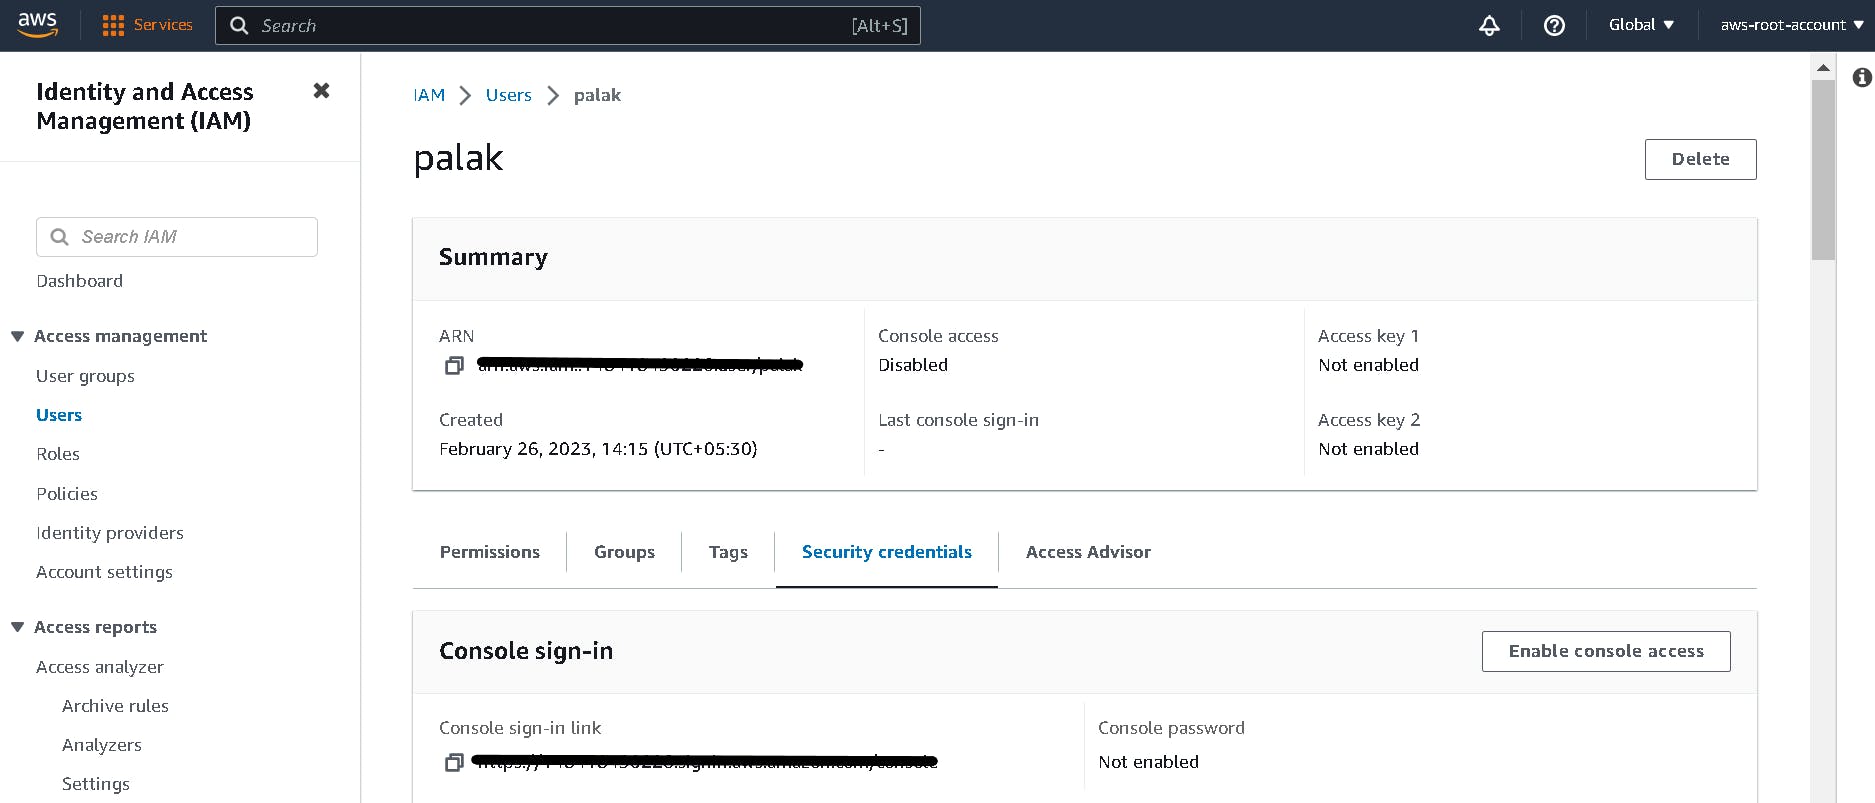
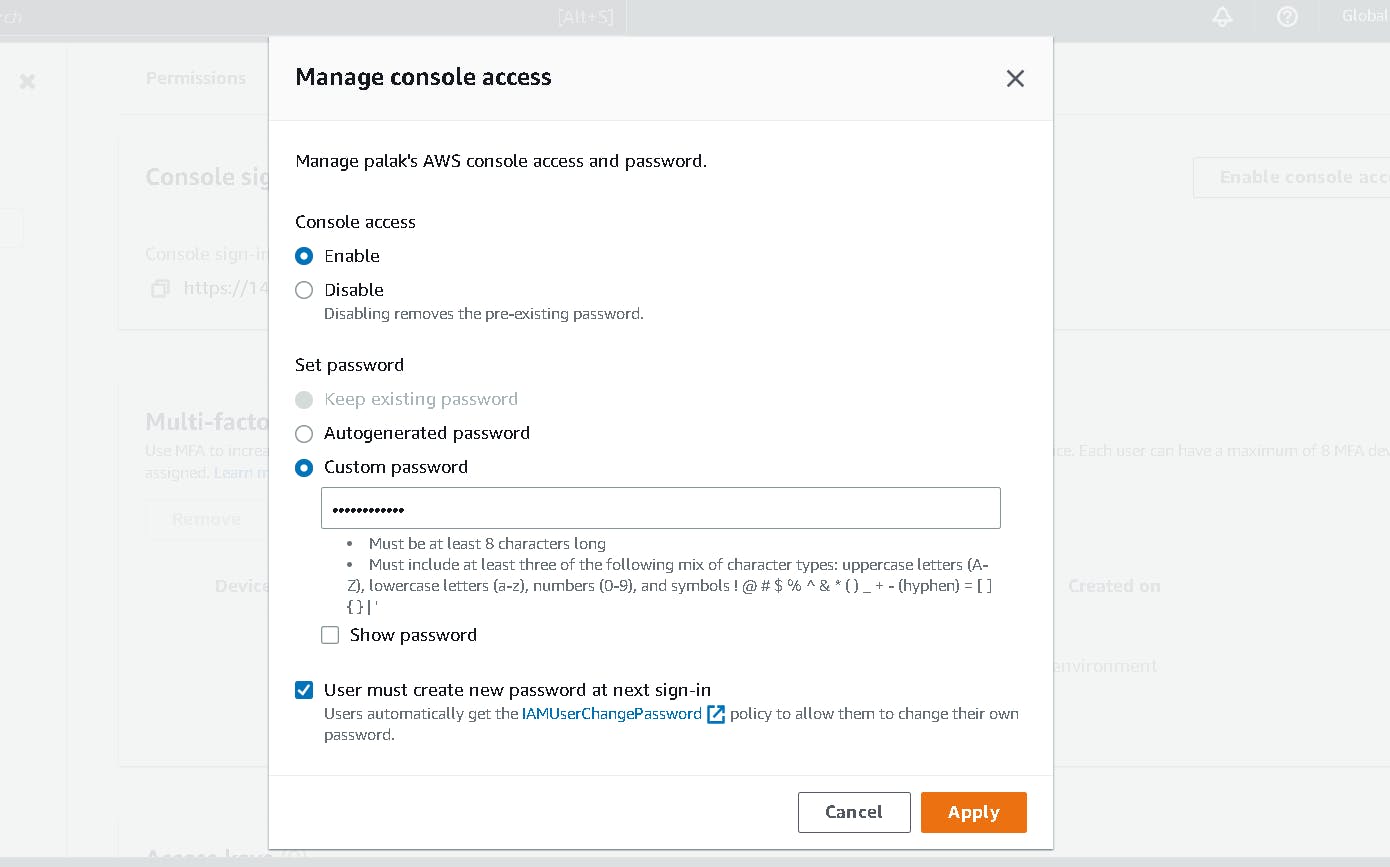
Click on your username and go to Security Credentials and click Enable console access under Console sign-in. Select enable and a custom password on the next window.
Create a strong password for this user and checkmark User must create new password at next sign-in and click on Apply and download the CSV file
Go to the dashboard and in right, click on the Create button. It will create the Account alias for your IAM user so that whenever you log in you don't have to enter the Account ID instead you can use the alias that you have created.
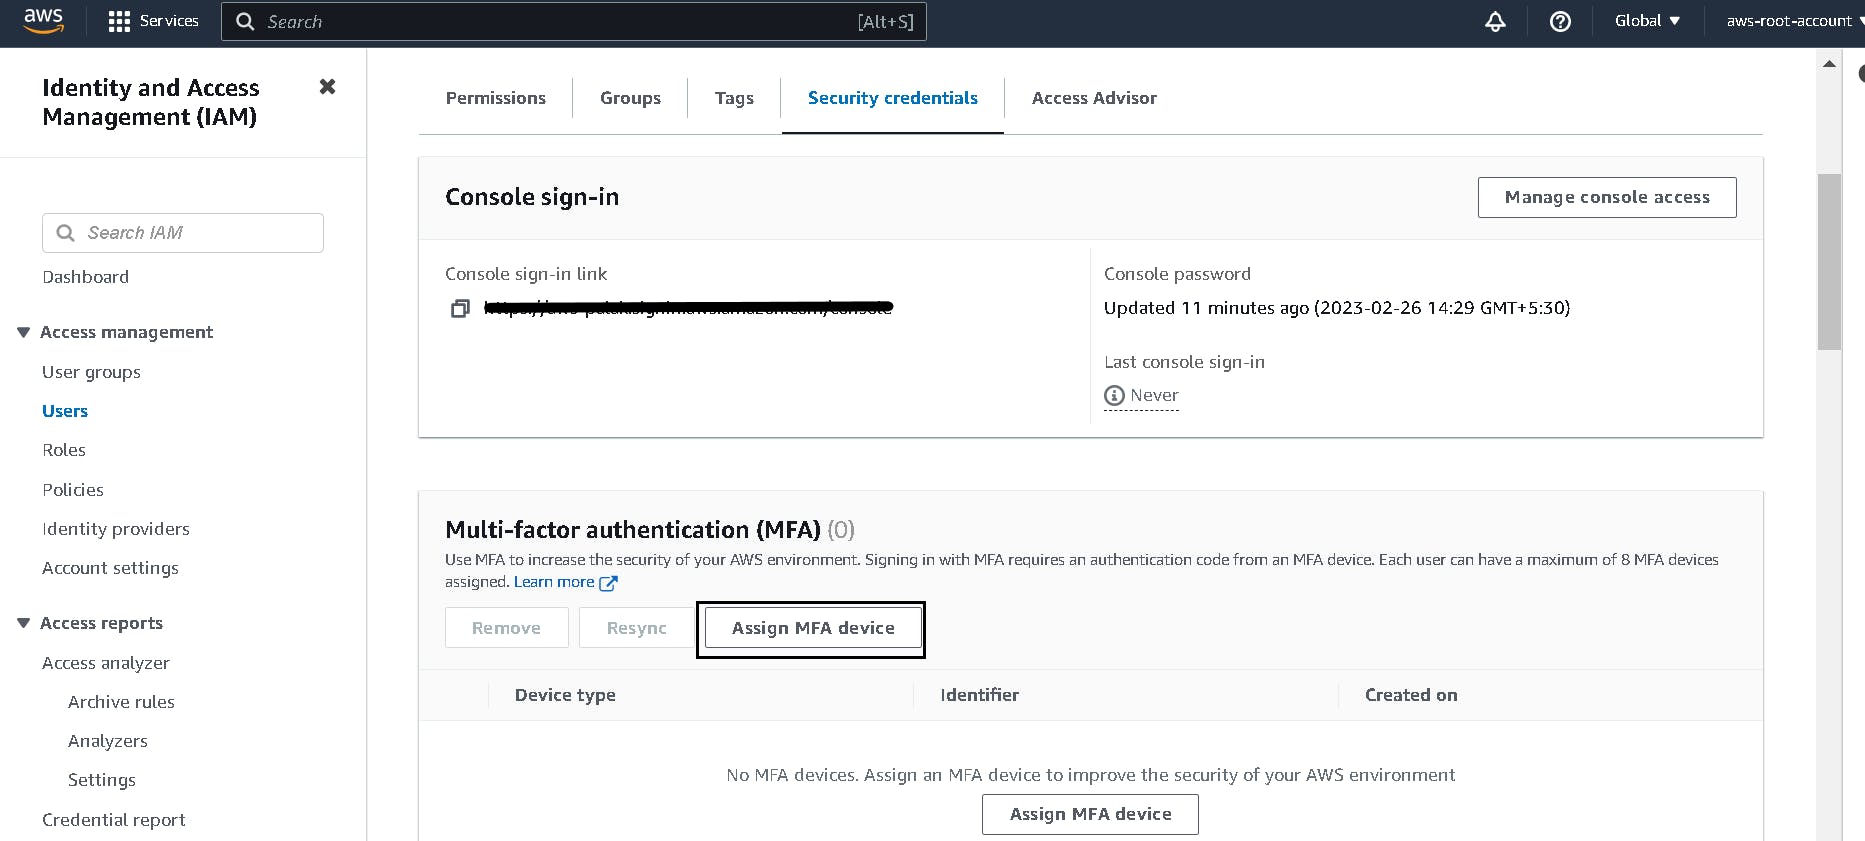
Enable MFA for IAM user: Go to User, click on your username and go to security credentials and click Assign MFA device. Set the MFA for this user in the same way that we have created for the root user.
5. Create a Billing Alert
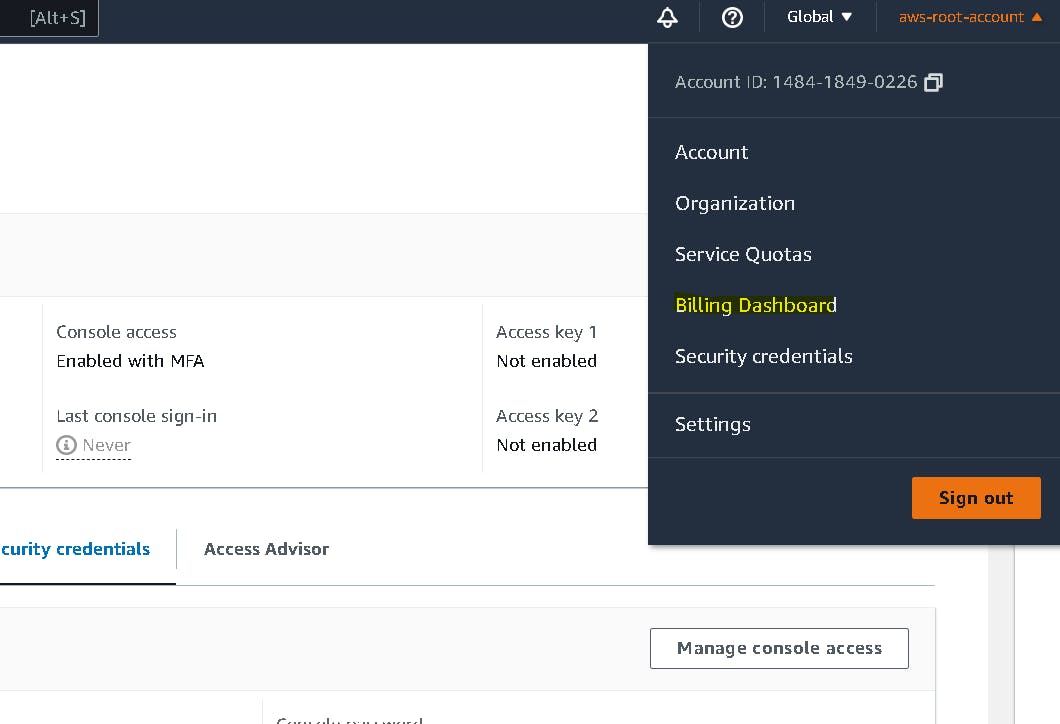
To safeguard your account from using services that are not under the free tier and to get email notifications whenever you cross the minimum bill amount we have to create a billing alarm. Go to the dropdown under your root user and click Billing dashboard.
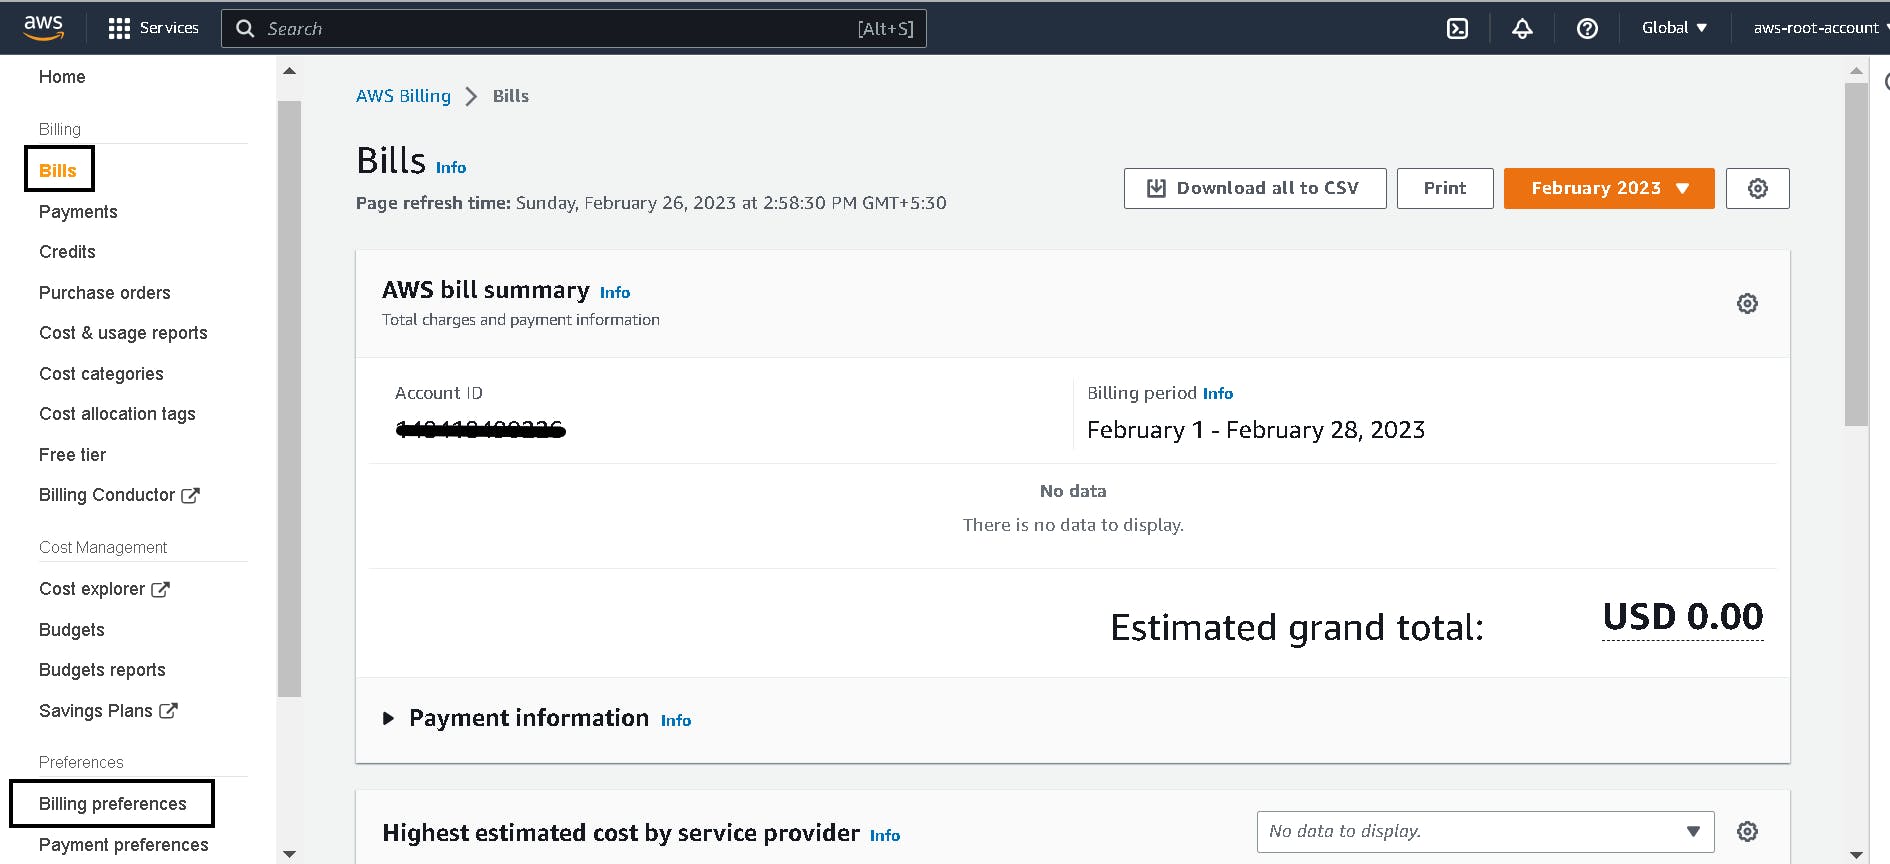
Click on Bills in the right panel and then Billing preferences. Select the checkbox for Receive PDF Invoice By Email and Receive Free Tier Usage Alerts and Receive Billing Alerts. Give your email address to receive the notifications for billing alerts and click save preferences.
6. Create CloudWatch Alarm
You can monitor your estimated AWS charges by using Amazon CloudWatch. Search for CloudWatch in AWS services and select it. Billing metric data is stored in the US East (N. Virginia), make sure you are in N. Virginia region before creating alarms.
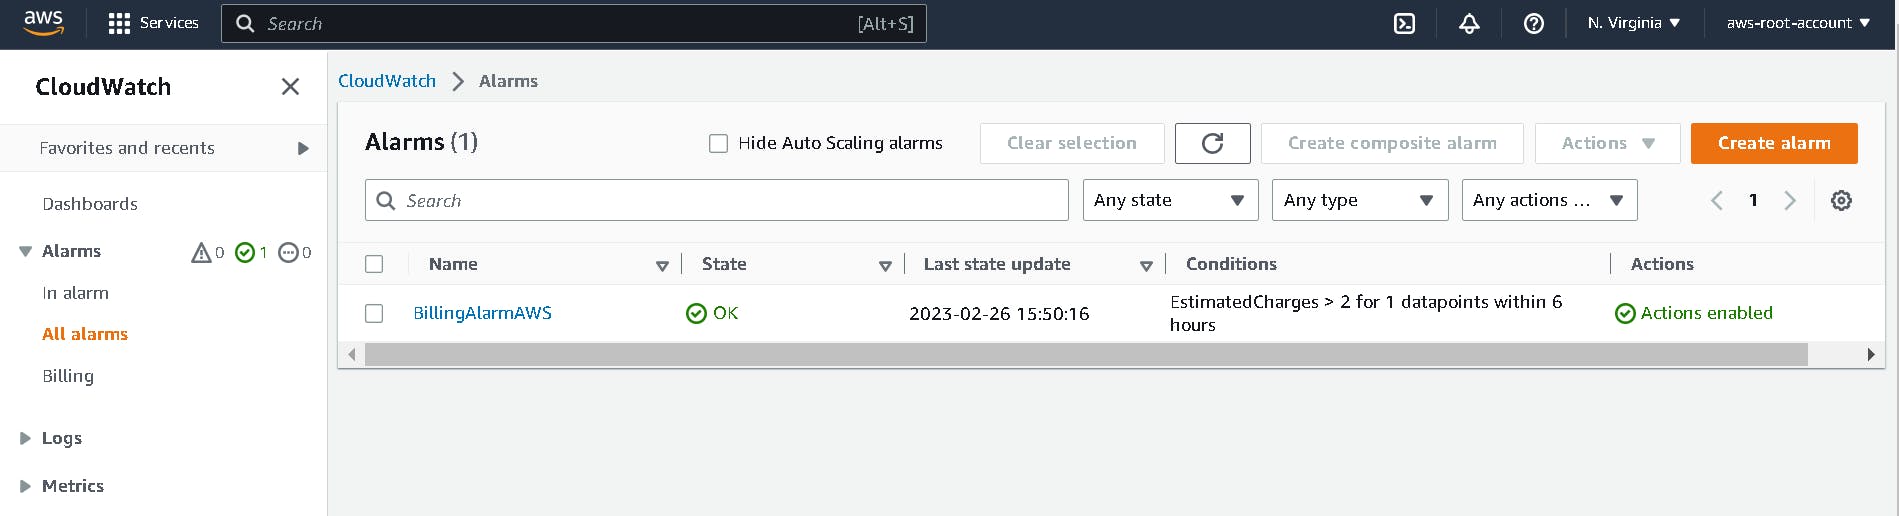
Click on All alarms in the left panel and select Create alarm. Select metric and scroll down, you will see billing as we have created an alert for billing in the previous step.
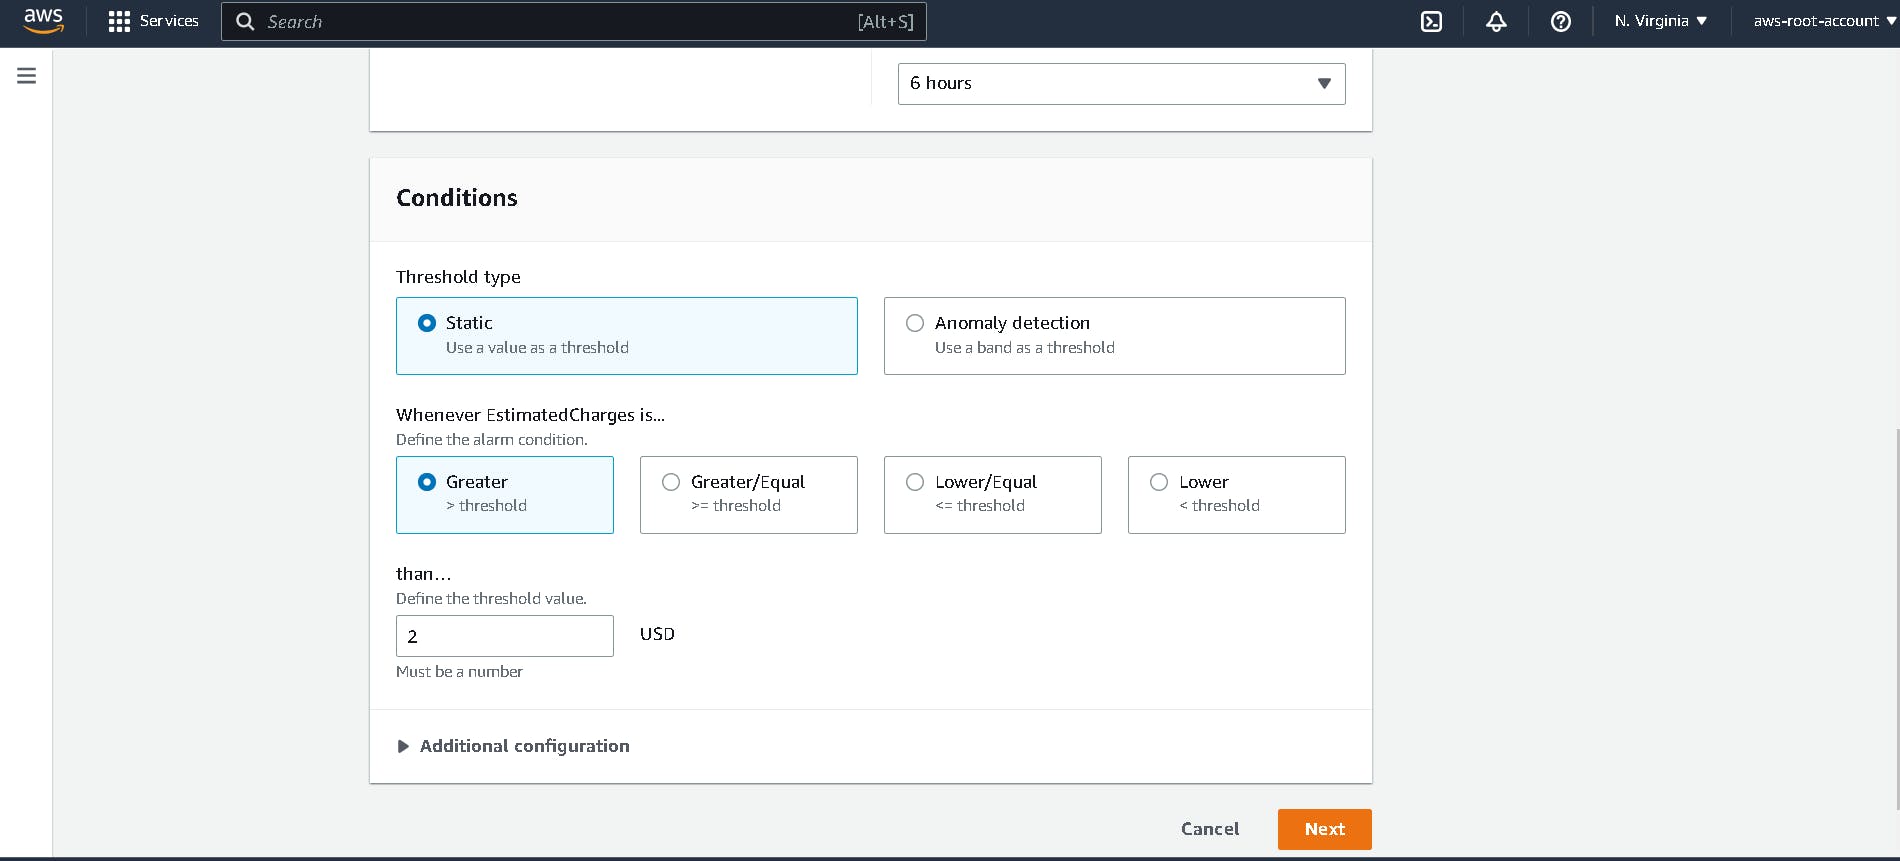
Click on Billing and Total estimated charge. Click USD and Select metric. On the next page define the threshold value. If you want to get an alert if your billing amount gets more than 2 USD then enter that value and click Next.
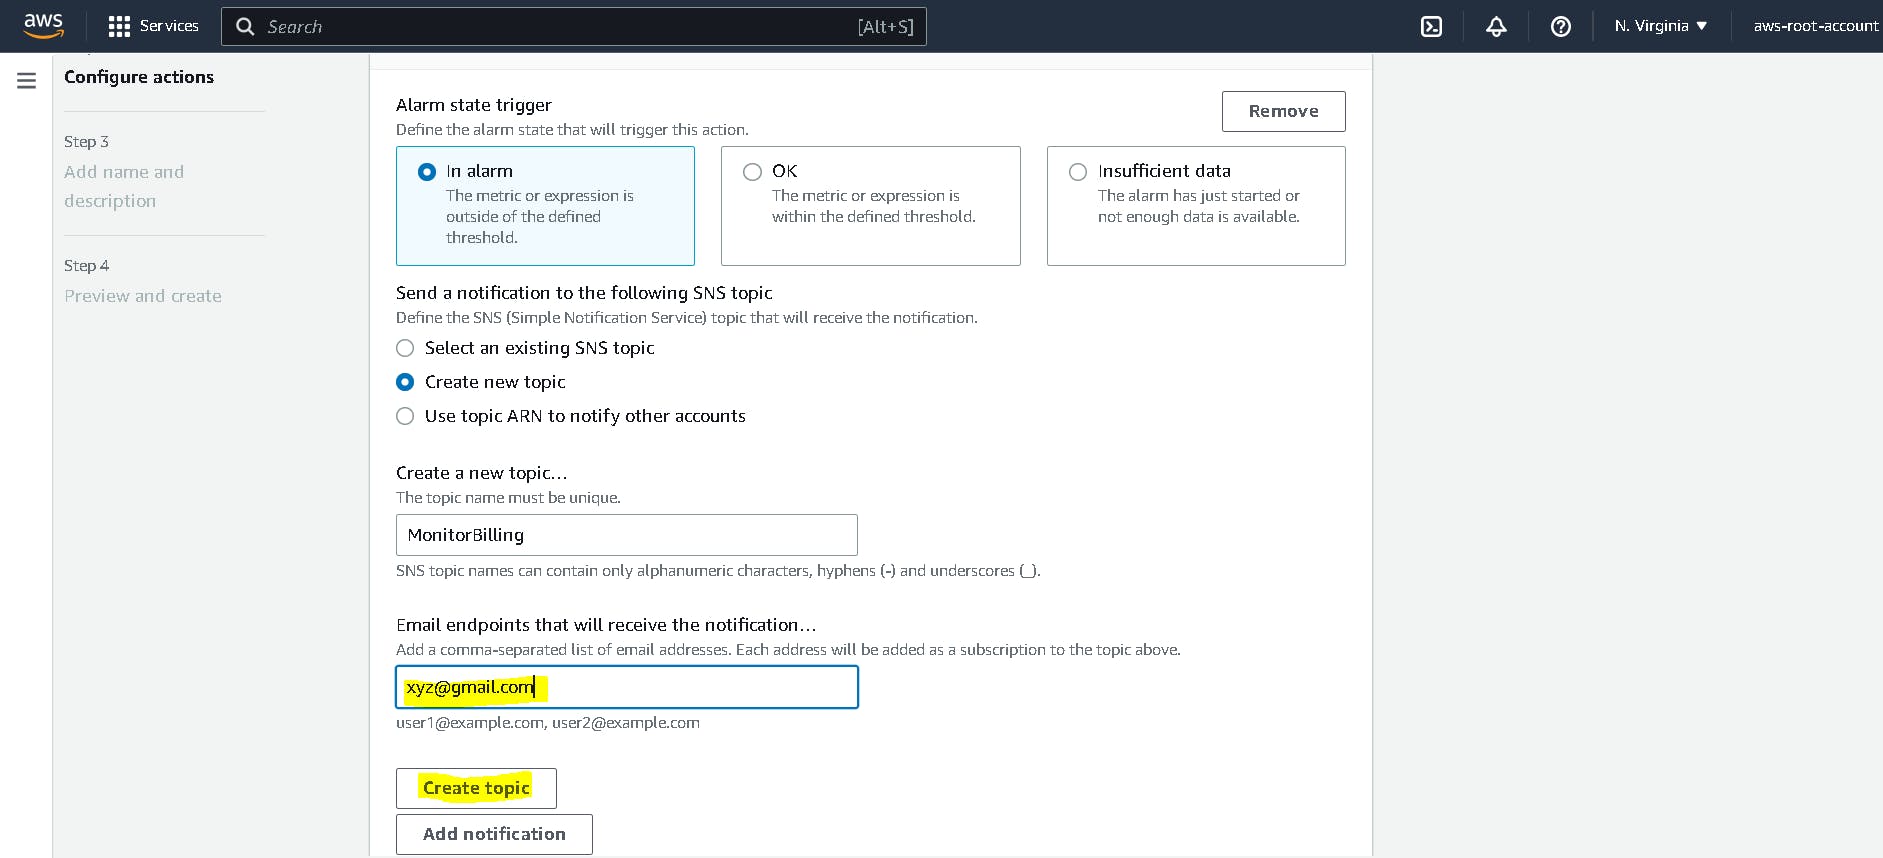
7. Create an SNS Topic
Select create new topic and give a name to this topic and enter your email address then click Create topic and click Next. On the next page give a name to the alarm and click Next and Create alarm.
Go to your email and confirm the subscription. The alarm will trigger when your account billing exceeds the threshold you have specified. The status is Ok as my billing is less than 2 USD.
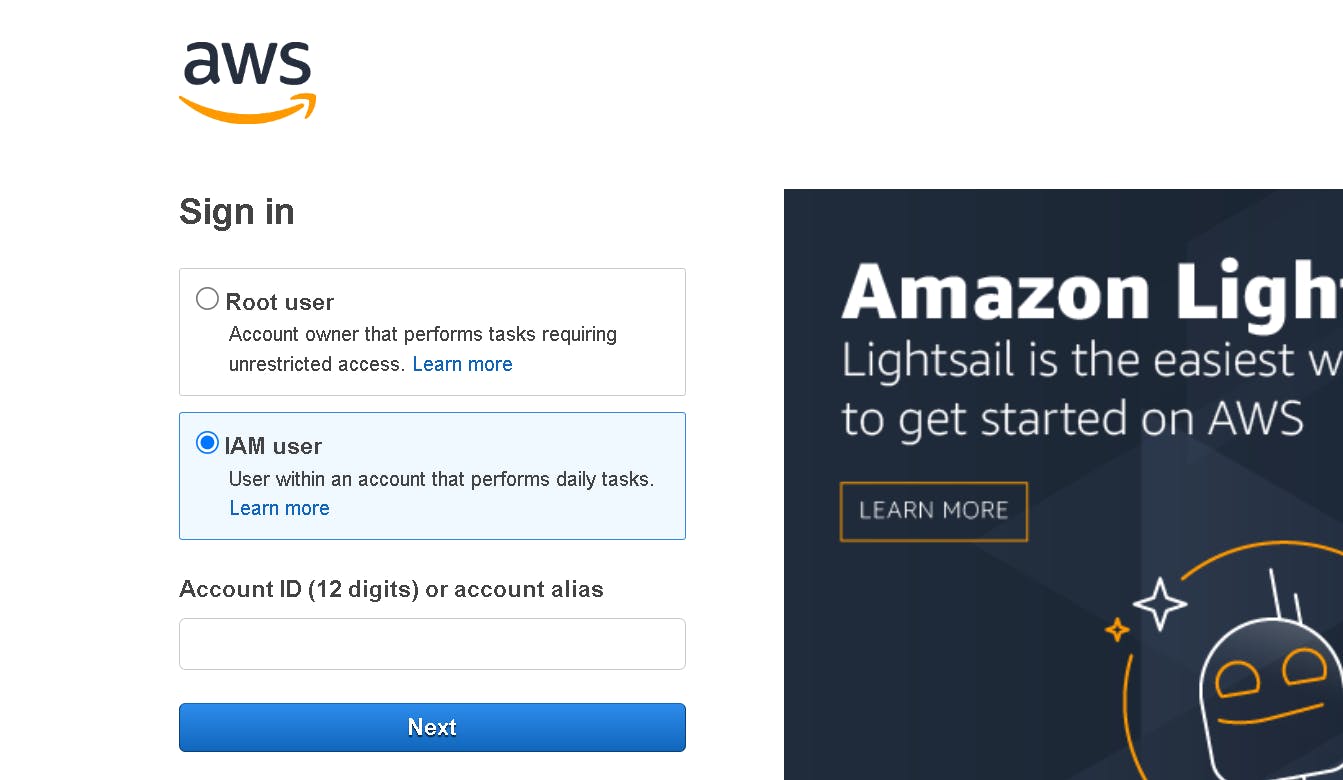
Now, Sign out from the root user. Sign in as an IAM user and use an alias (instead of AccountID) that we created in the previous step. In the username enter the name of the IAM user and the password that we set up. Get the verification code from google authenticator for IAM users and click sign in. The window will prompt you to set a password. Create a new password, and make sure it's strong and has more than 8 digits.
Congratulations🥳🥳, we have created AWS free tier account and learned about IAM users, IAM policy, and CloudWatch alarm.
If you face any issues contact me on my socials 👉 Contact me