

Amazon Elastic Compute Cloud(EC2) is a web service that provides secure, resizable computing capacity in the cloud. It allows users to rent virtual computers, launch as many or as few virtual servers as needed, configure security and networking, and manage storage. Amazon EC2 enables you to scale up or down to handle changes in requirements or spikes in popularity, reducing your need to forecast traffic.
User data script is the easiest and most popular way to send instructions to an instance at launch. You should allow a few minutes of extra time for the tasks to complete before you test that the user script has finished successfully.
When you launch an instance in Amazon EC2, you have the option of passing user data to the instance that can be used to perform common automated configuration tasks and even run scripts after the instance starts.
So, here I am using the Ubuntu system for installing Jenkins:
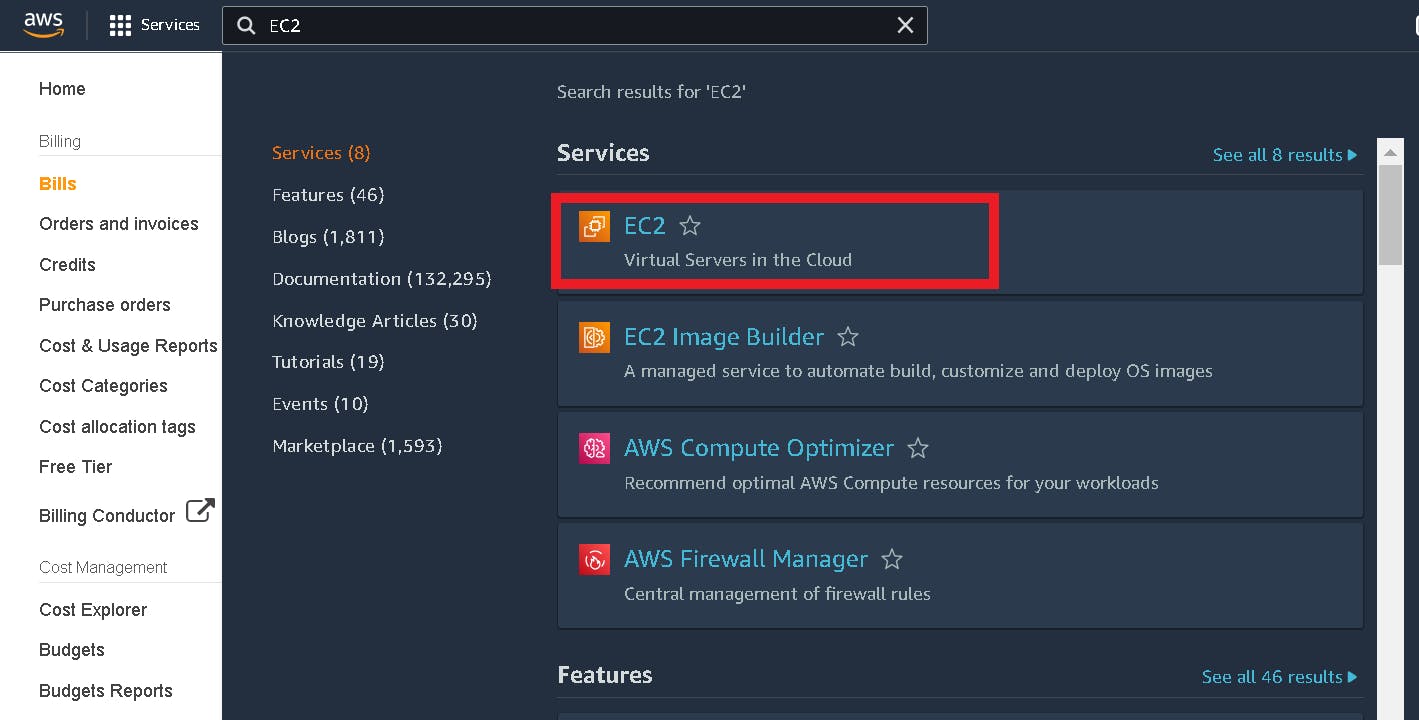
1. Login into AWS and search for EC2 in services
Click on EC2 and explore the dashboard.
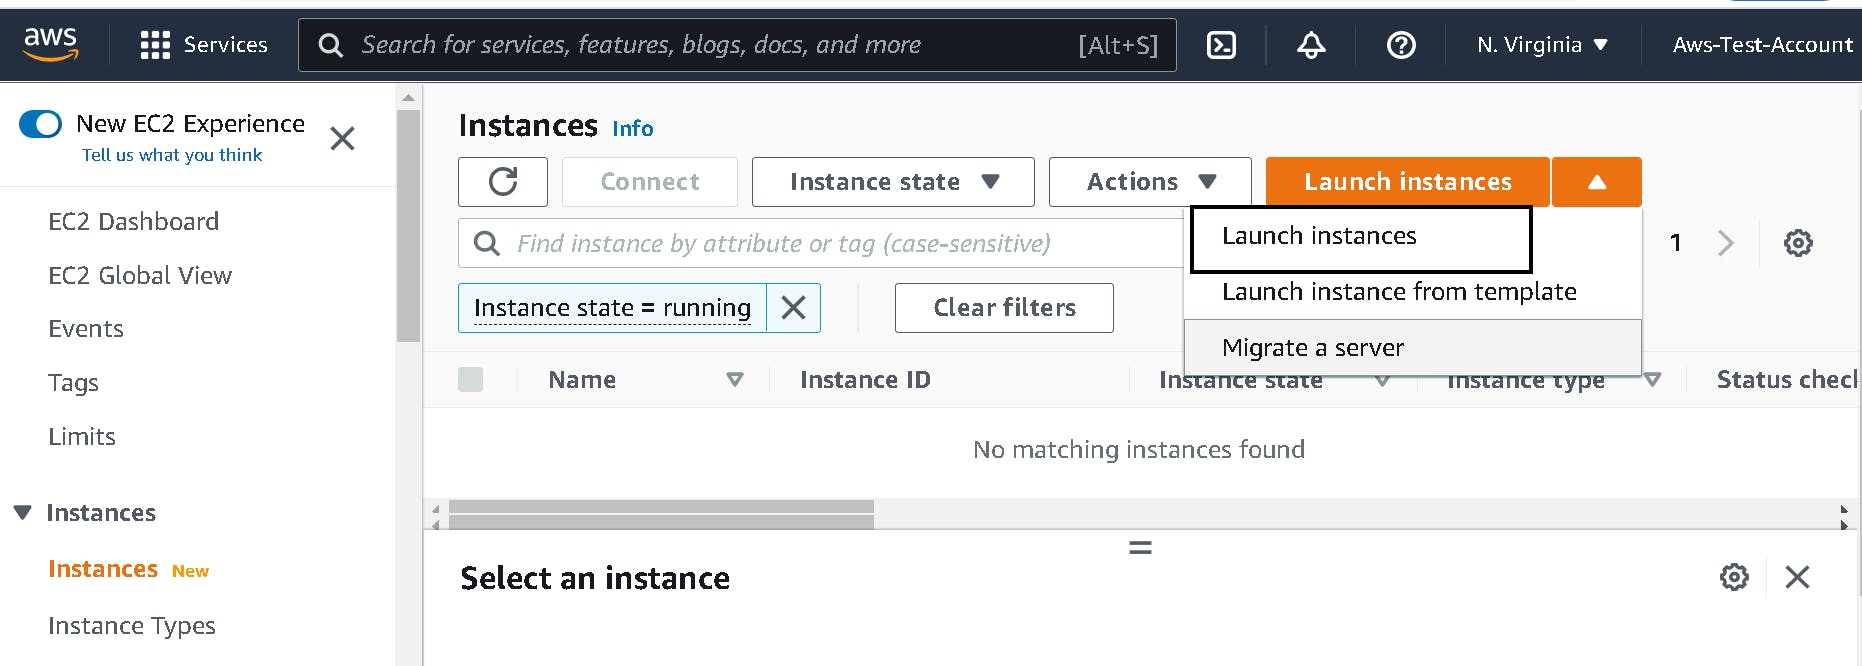
2. Launch an EC2 Instance
For creating a new instance, click on instances and choose Launch instances from the dropdown.
3. Configure EC2
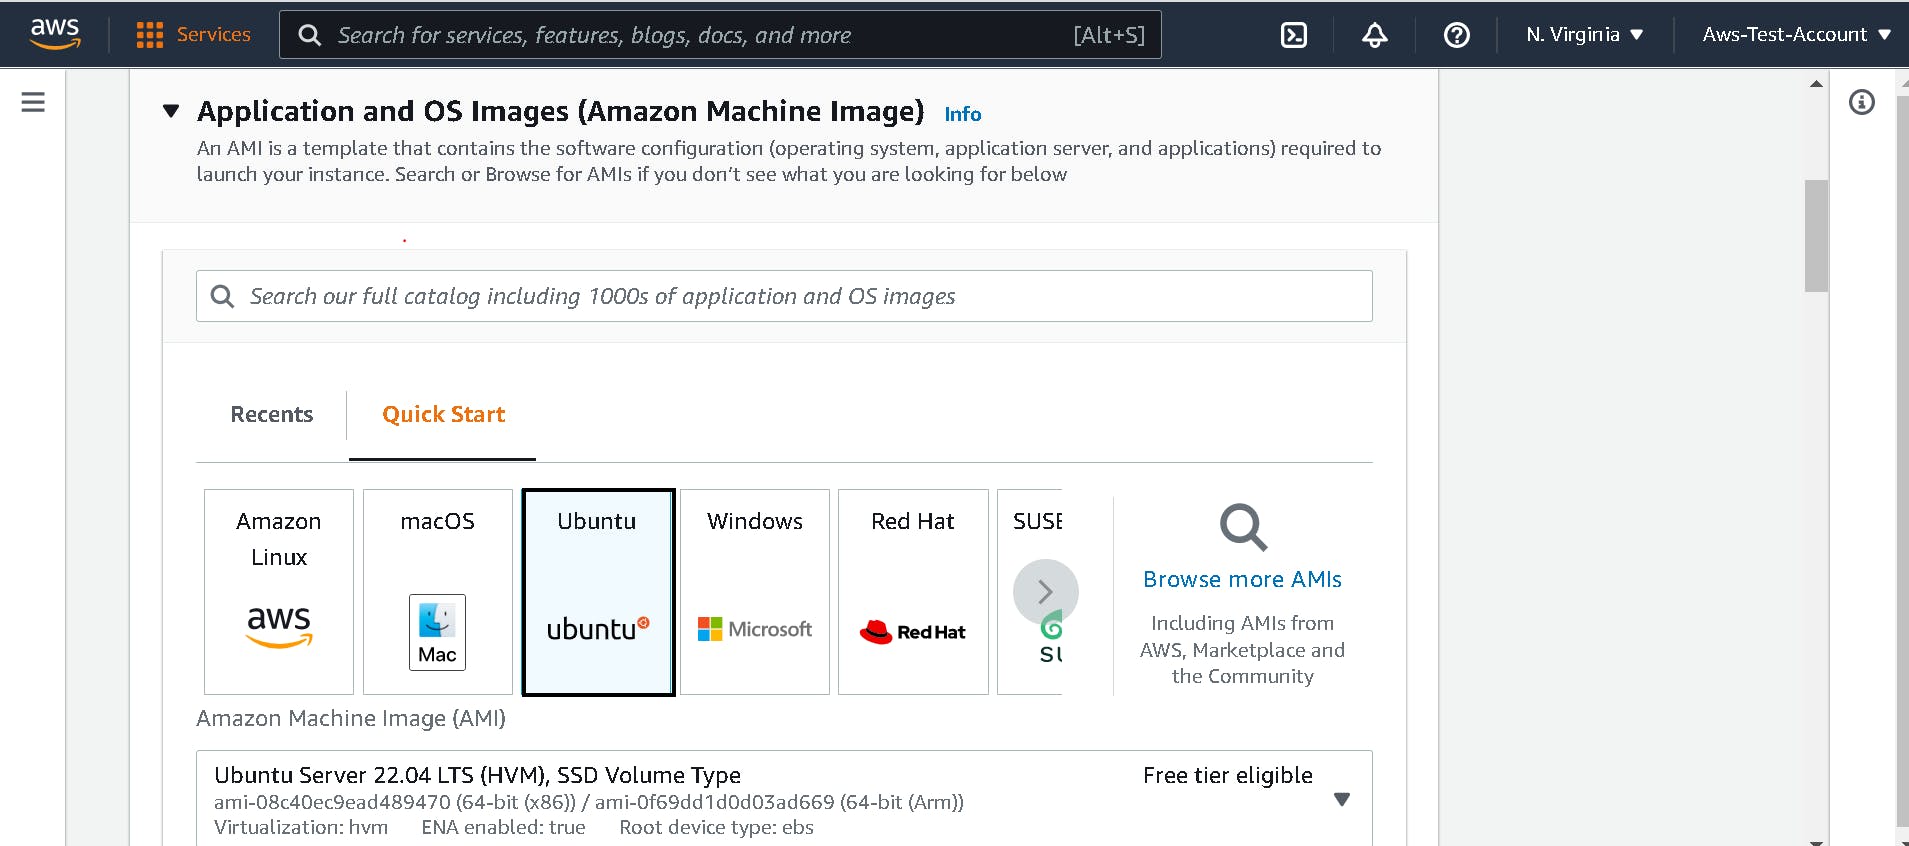
Enter the name of your server like "Jenkins server" and choose Amazon Machine Image(AMI). An AMI is a template that contains a software configuration (for example, an operating system, an application server, and applications). In my case, I am selecting Ubuntu Server 22.04.
4. Create new key pair
Choose the instance type eligible for the free tier ( t2.micro) or higher instance type based on your server requirements. Click Create new key pair.
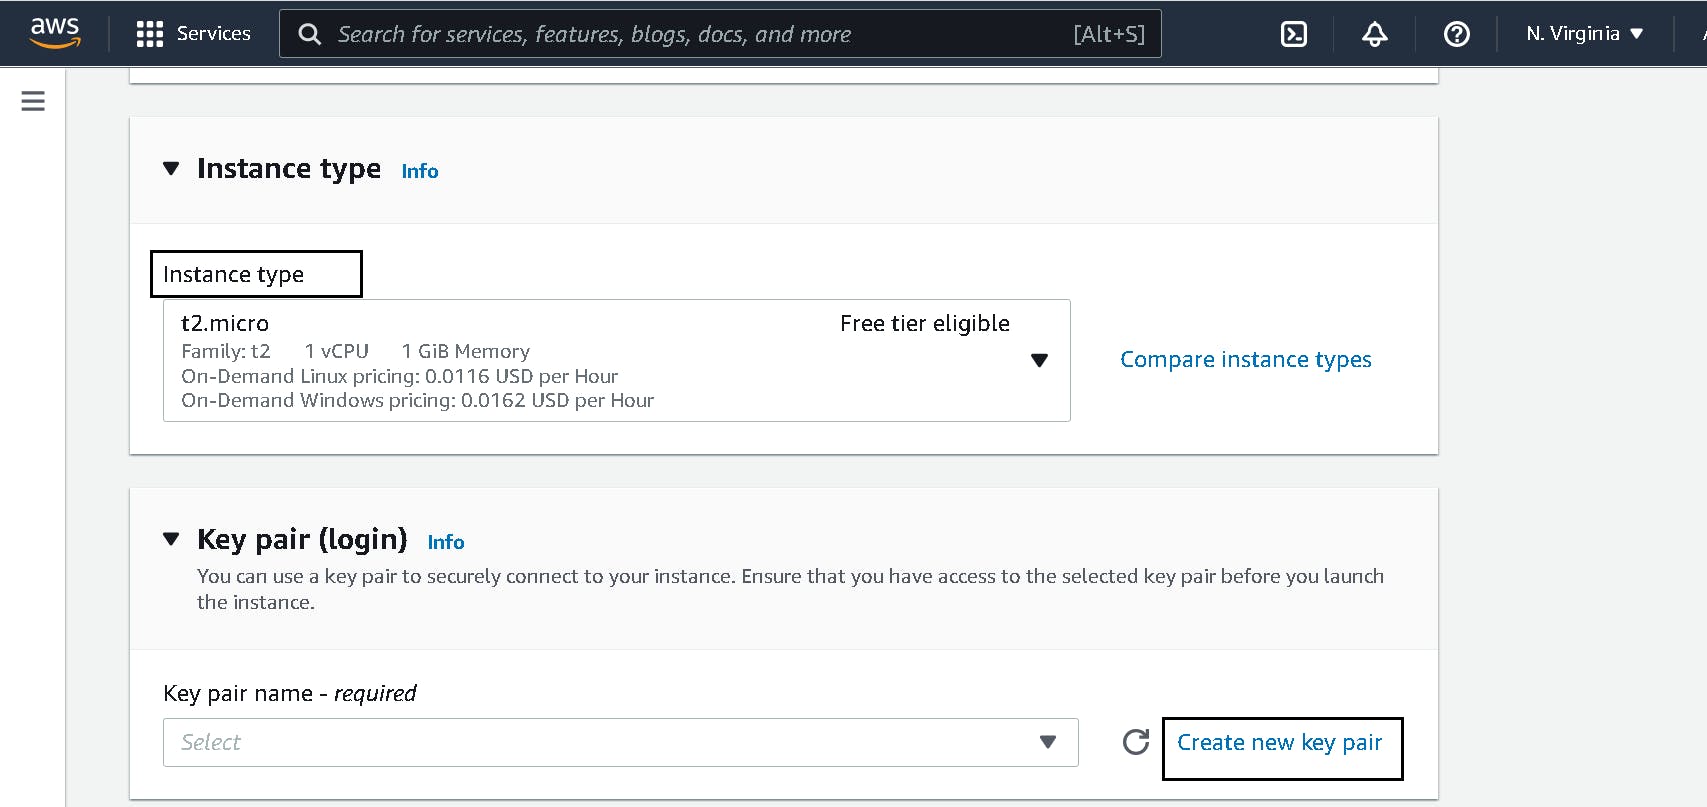
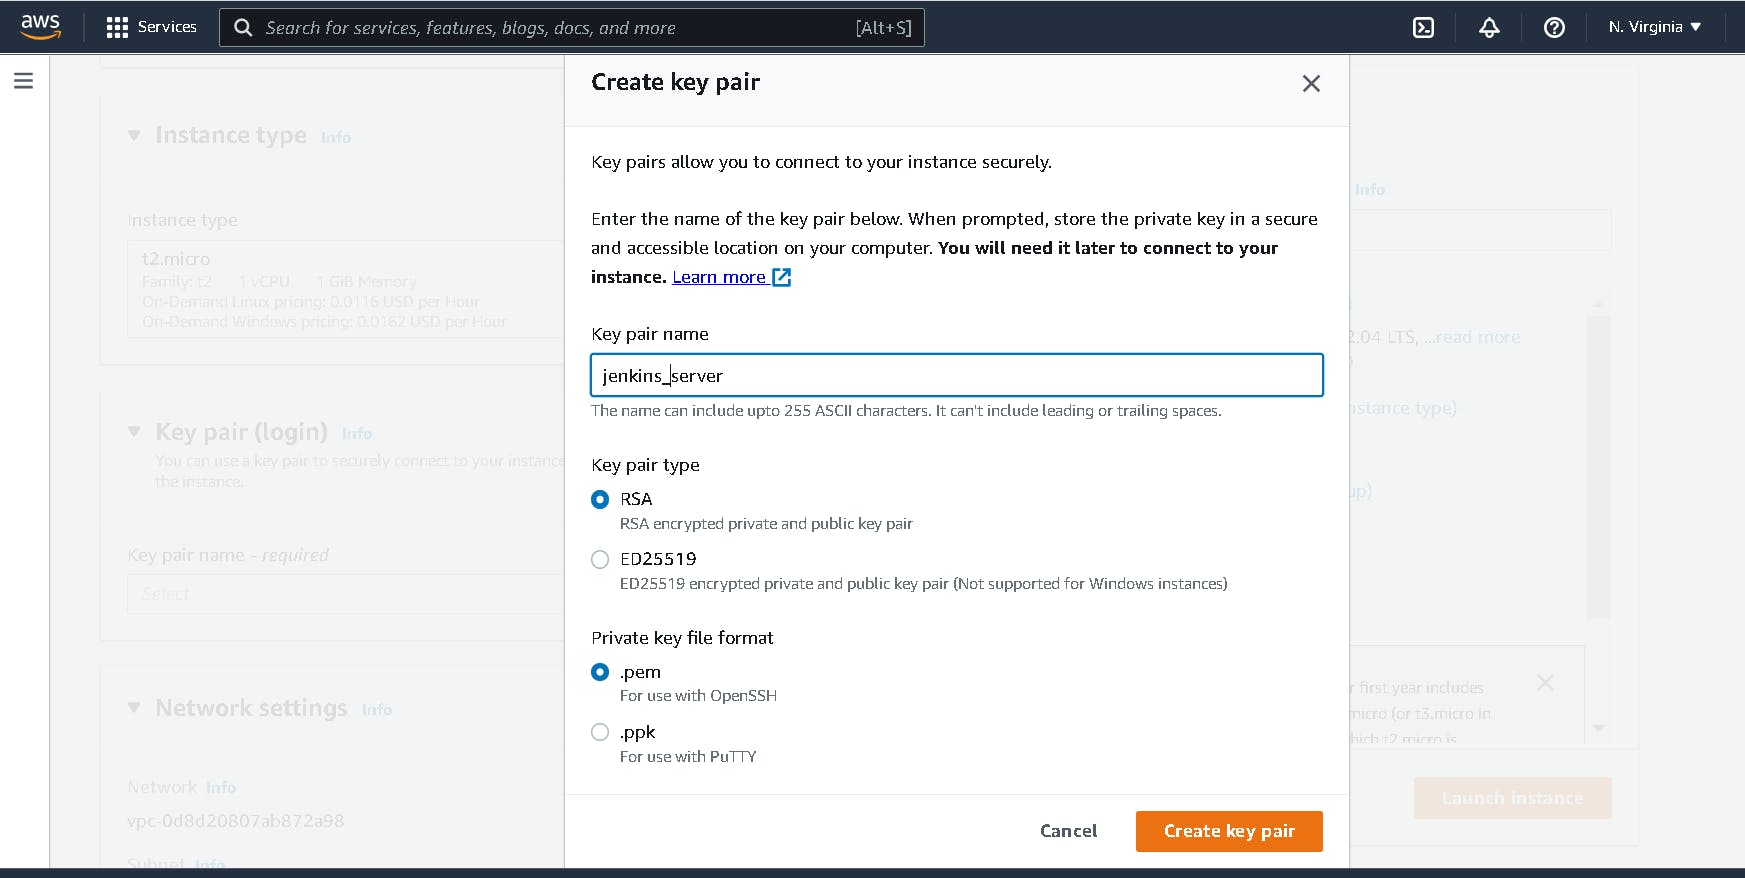
The key pair will allow you to SSH into the machine you just created. Create the key pair and download it, make sure to keep it safe as you will not be able to download it again. Choose key pair type as **RSA ** and .pem as private key format and click Create key pair.
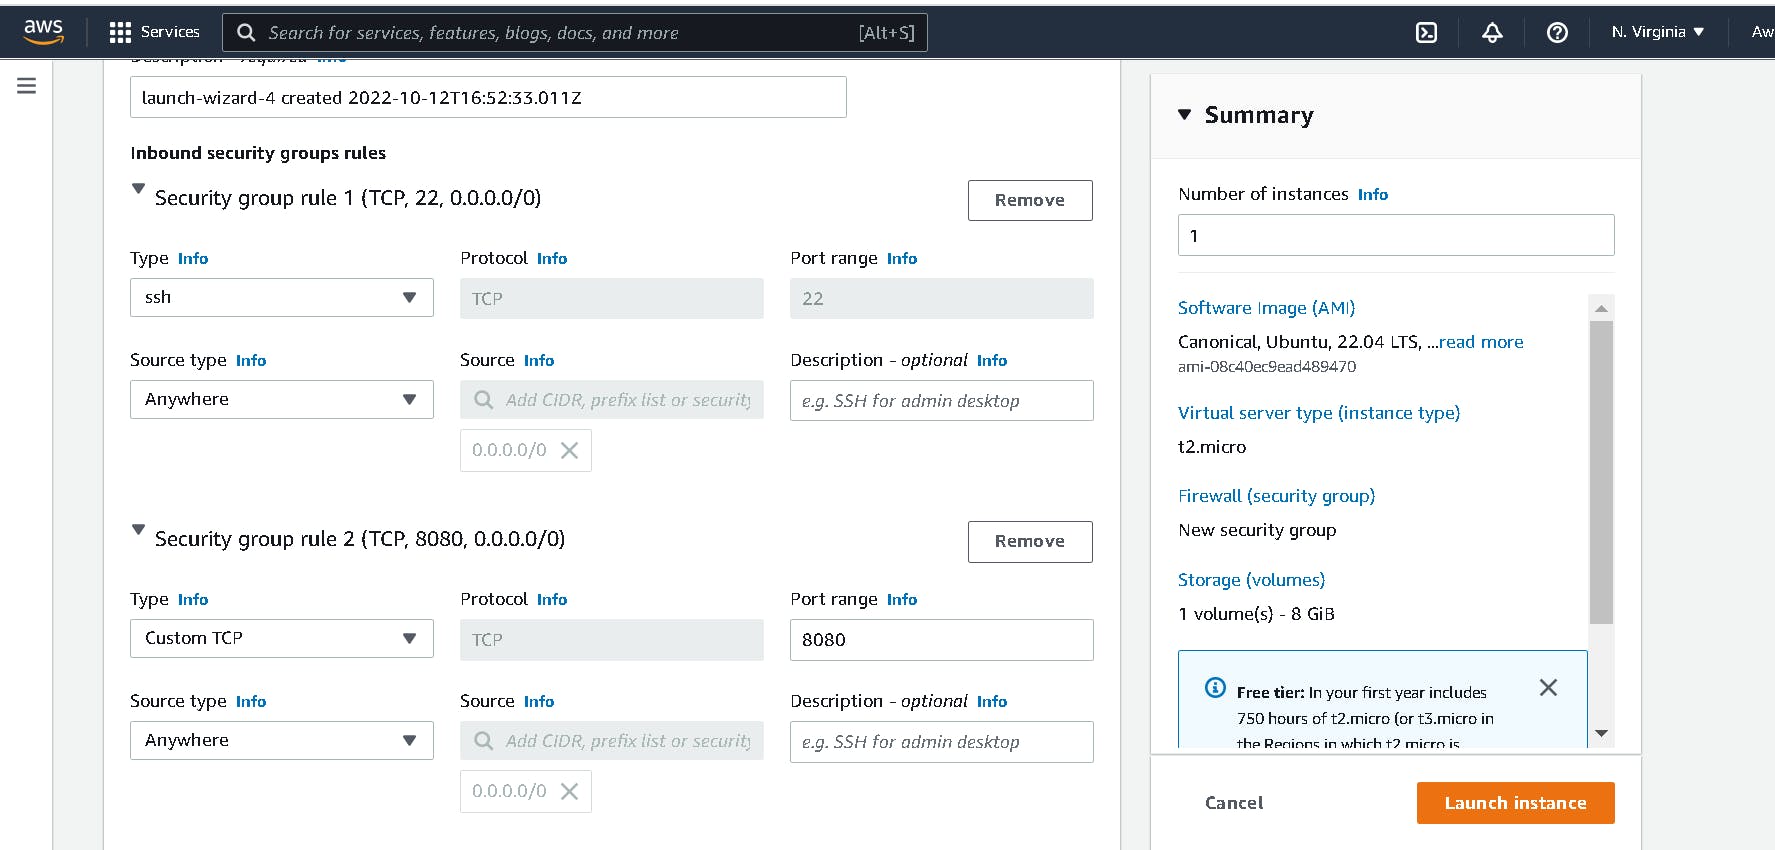
5. Configure network settings and Storage
Keep VPC and Subnet defaults in the network setting. Edit the security group and allow HTTP traffic from the internet at port 8080, by default Jenkins runs on port 8080. AllowSSH at port 22 from anywhere. Select the amount of storage you want for your system, 8 GB is eligible for the free tier.
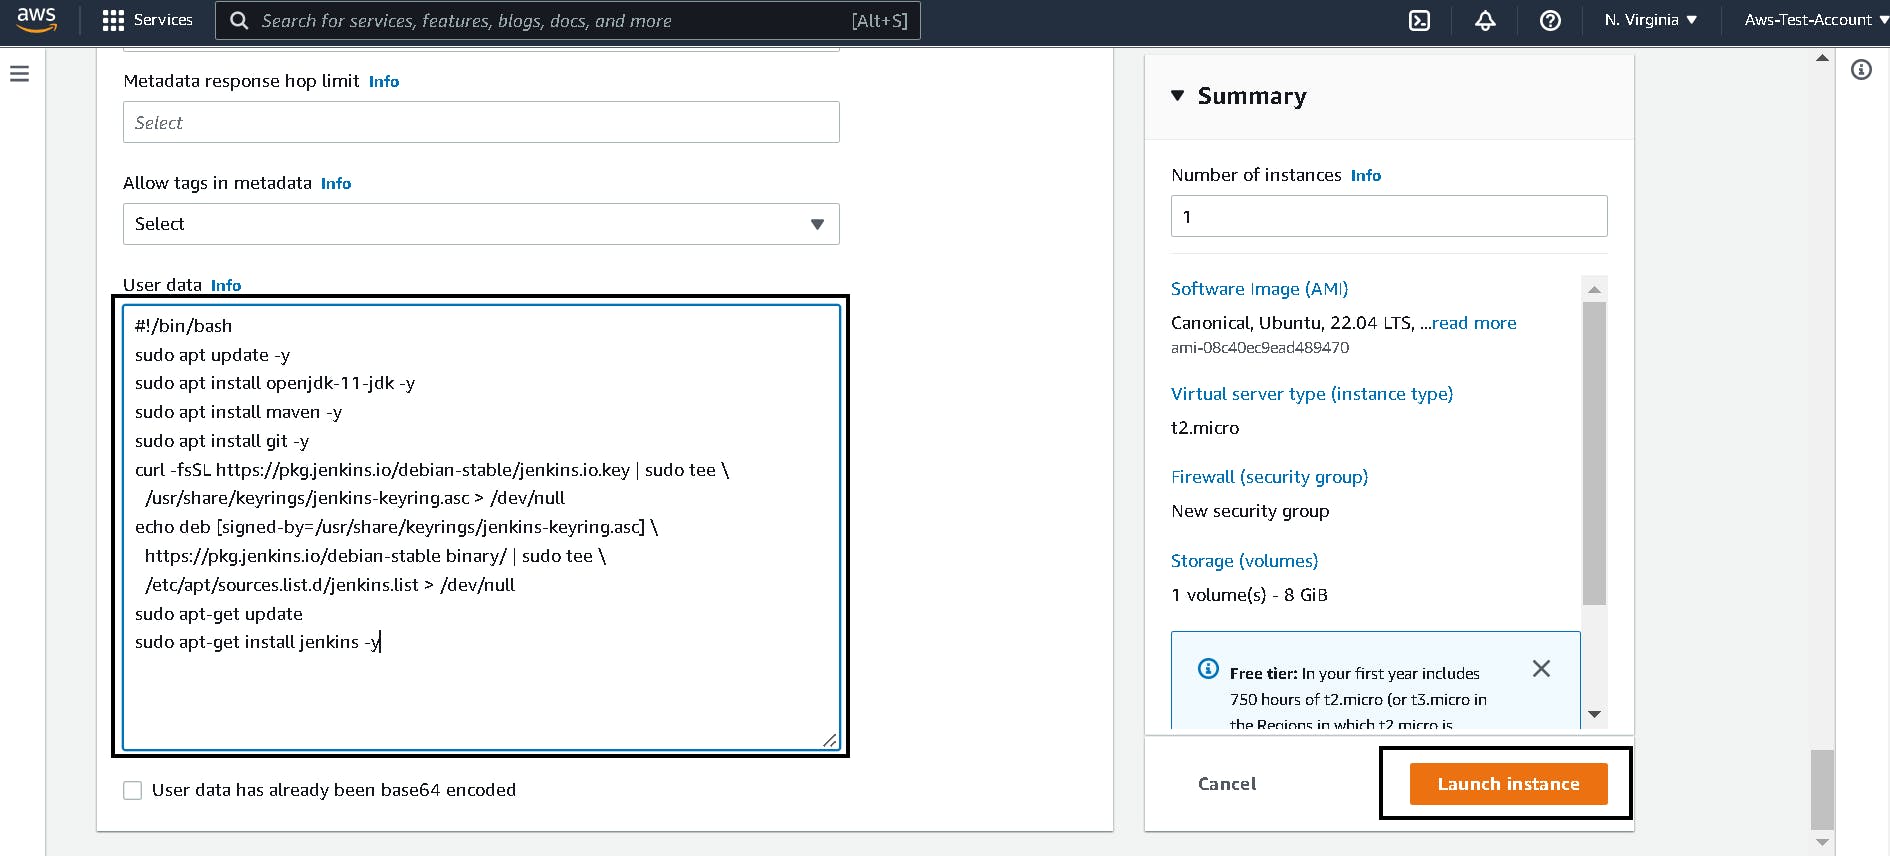
6. Advance details
Expand advance details section and scroll to the end. Copy and paste the user data script to install Jenkins at the time of launch. Lastly, click Launch instance in the bottom right corner.
#!/bin/bash
sudo apt update -y
sudo apt install openjdk-11-jdk -y
curl -fsSL https://pkg.jenkins.io/debian-stable/jenkins.io.key | sudo tee \
  /usr/share/keyrings/jenkins-keyring.asc > /dev/null
echo deb [signed-by=/usr/share/keyrings/jenkins-keyring.asc] \
  https://pkg.jenkins.io/debian-stable binary/ | sudo tee \
  /etc/apt/sources.list.d/jenkins.list > /dev/null
sudo apt-get update
sudo apt-get install jenkins -y
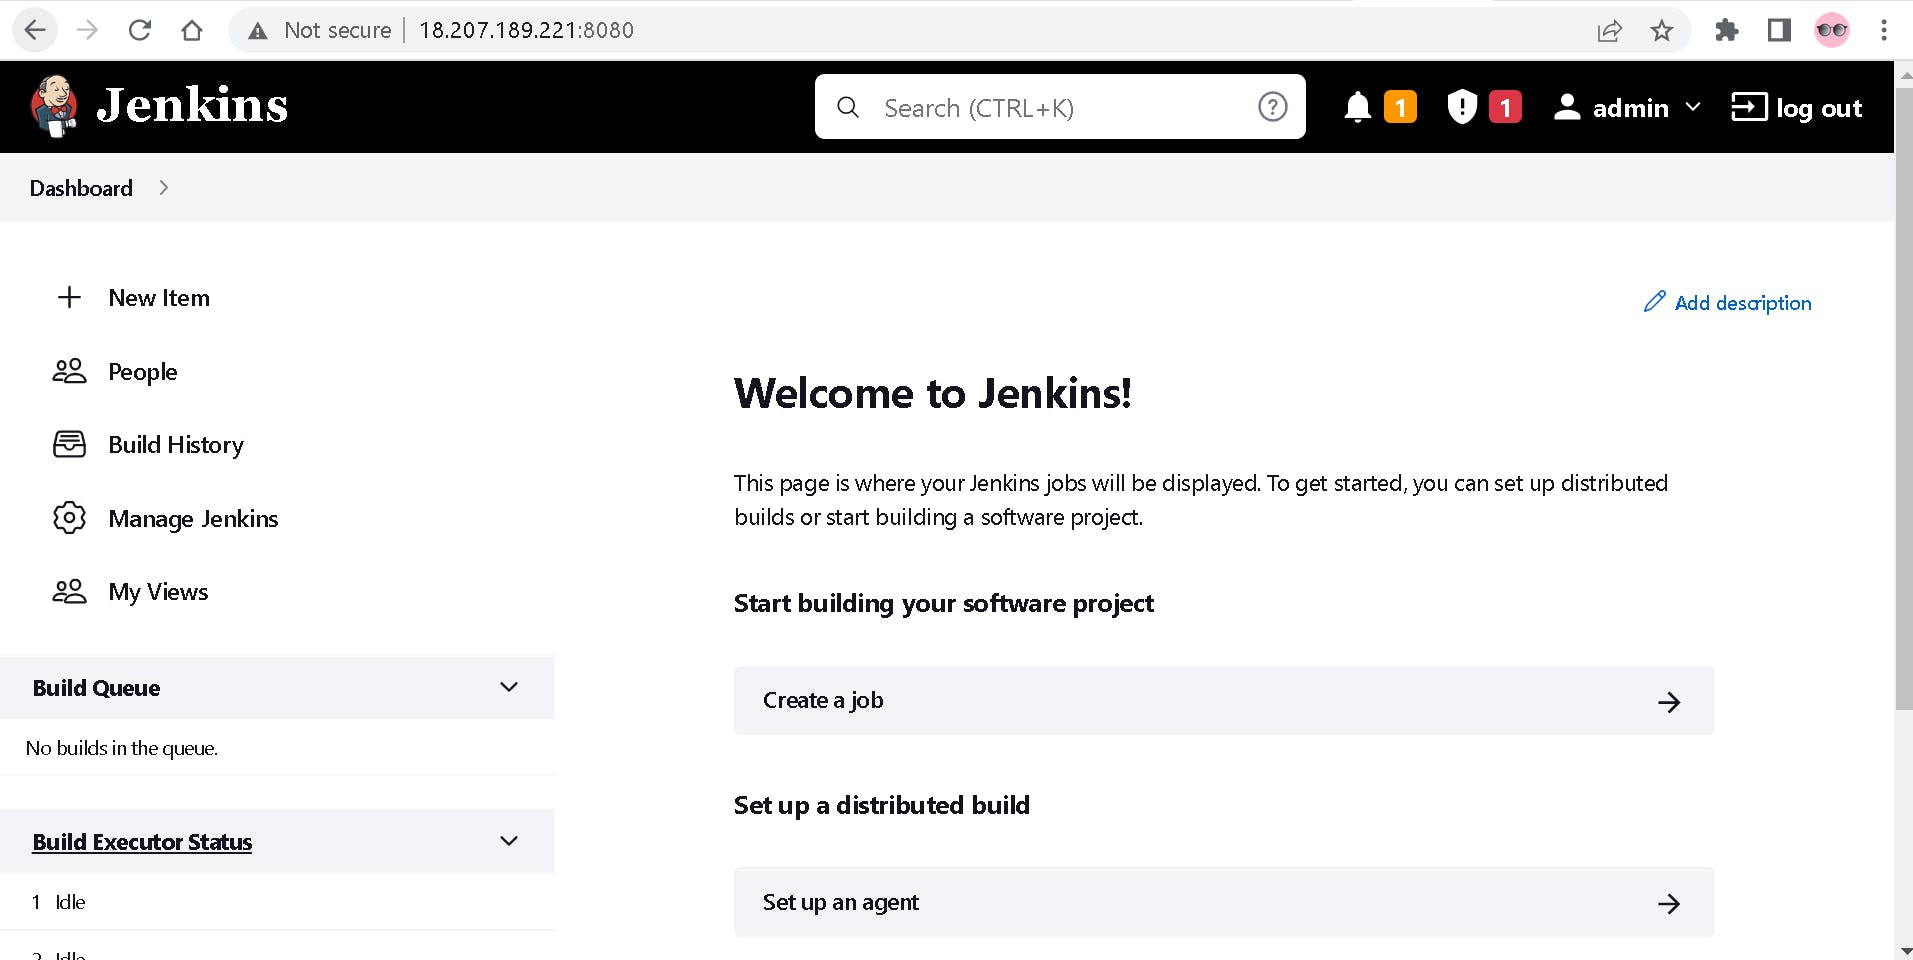
Your instance is running now, In order to access Jenkins in your local click the instance id of a running instance.
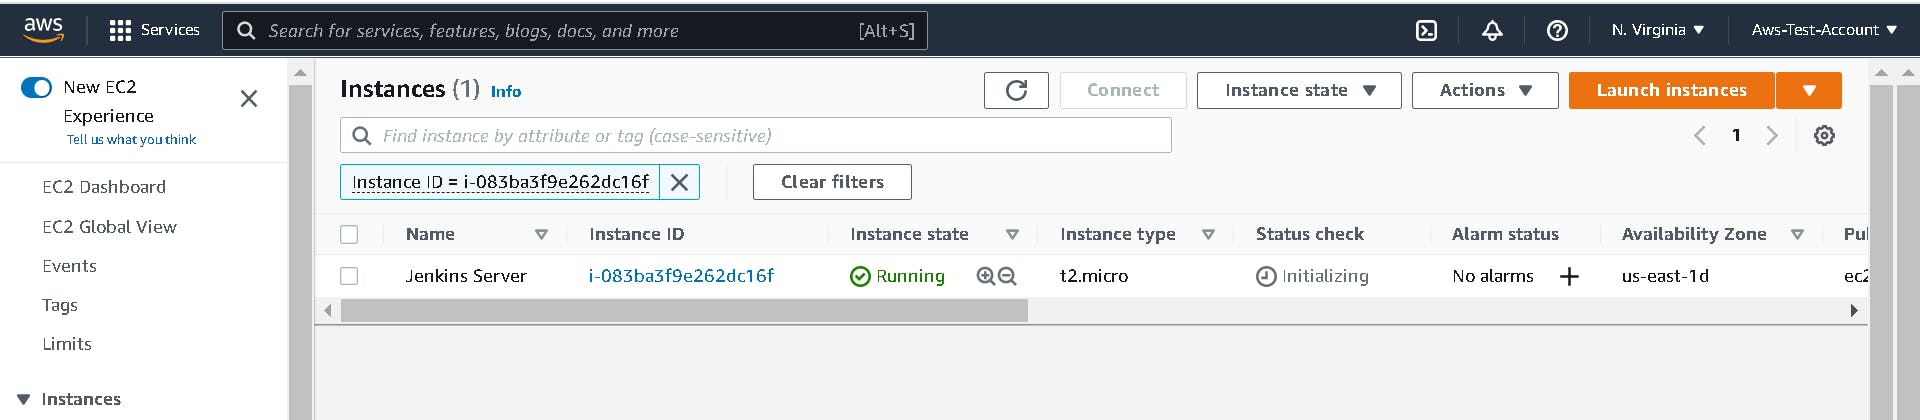
Click on your instance id and copy Public IPv4 address.
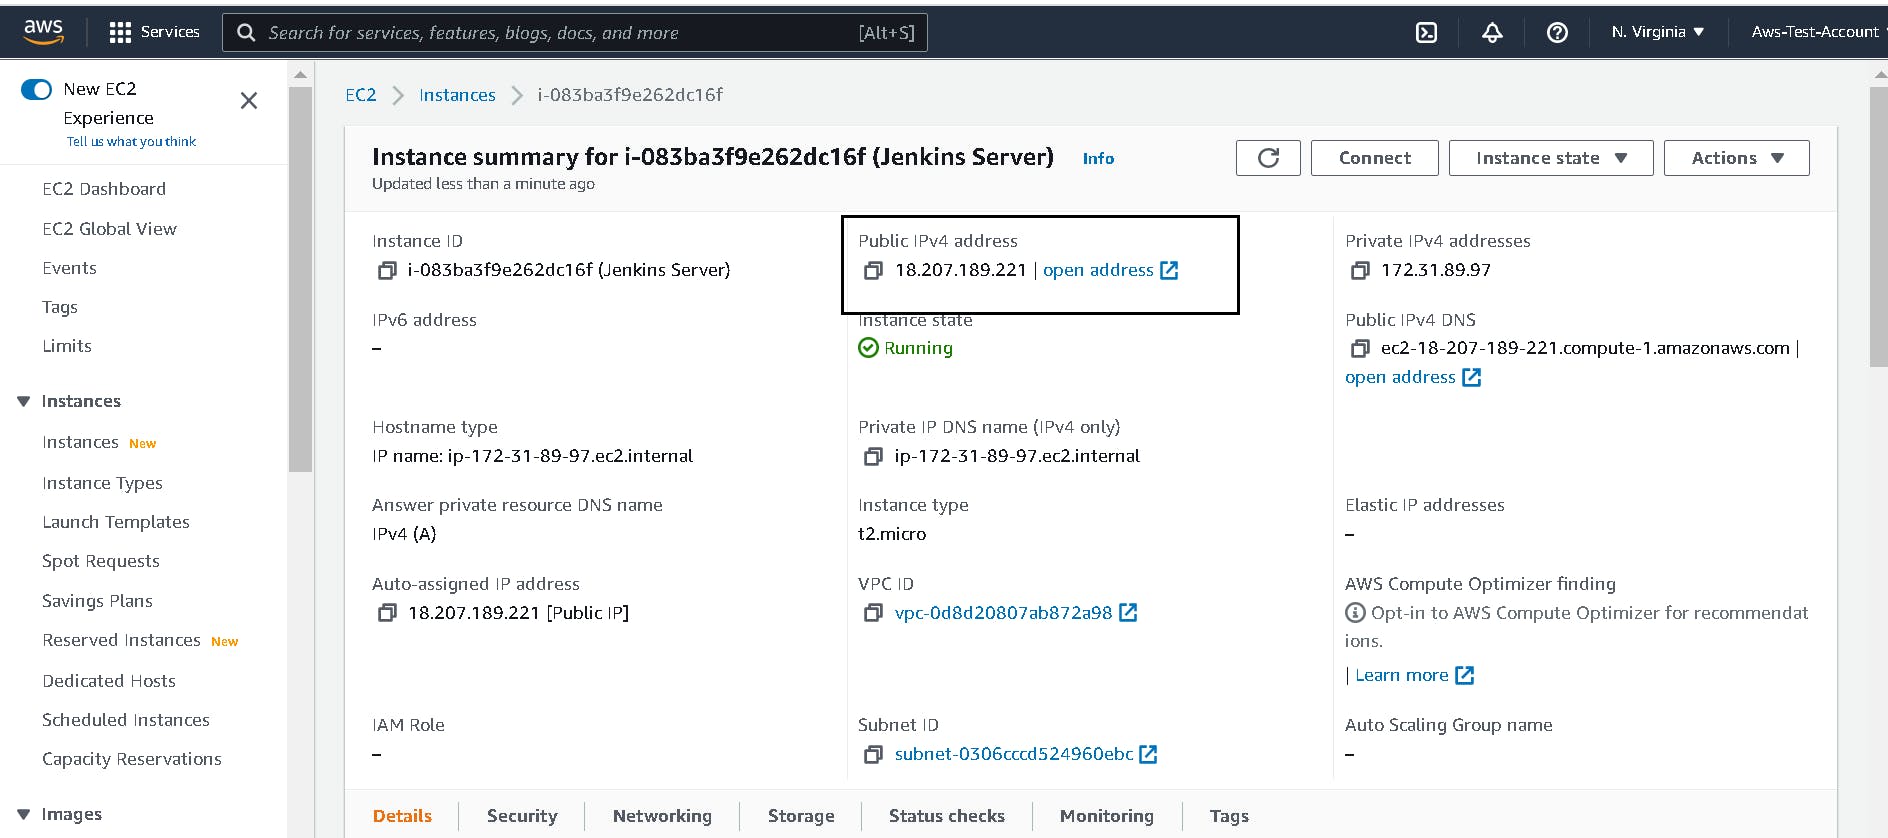
6. Access Jenkins
Go to your browser and search with Public IPv4 address:8080.

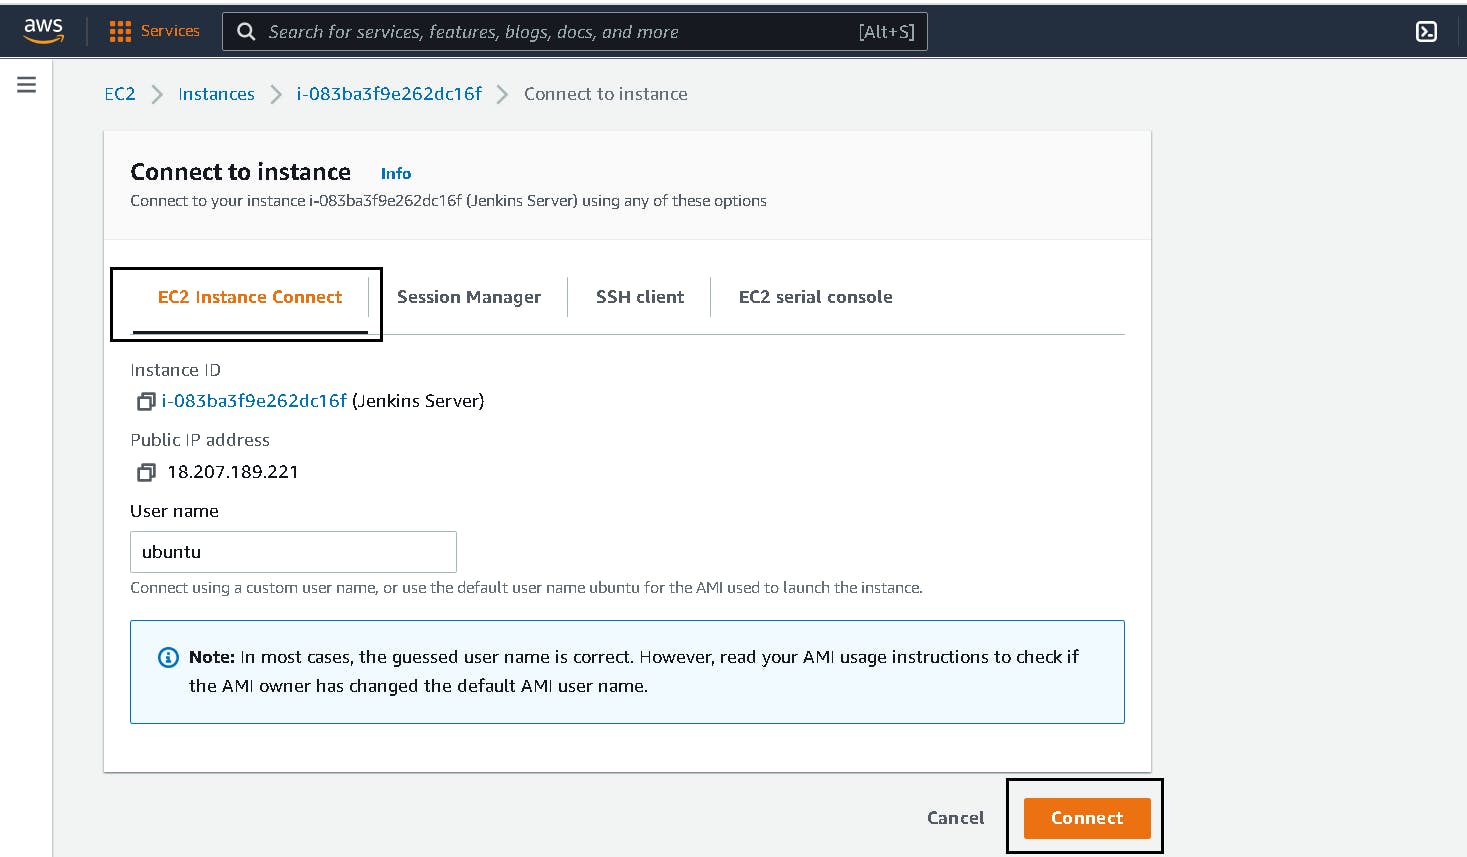
7. Connect to your instance
Click the **connect ** option in your instance menu. Go to the EC2 Instance Connect option and click connect.
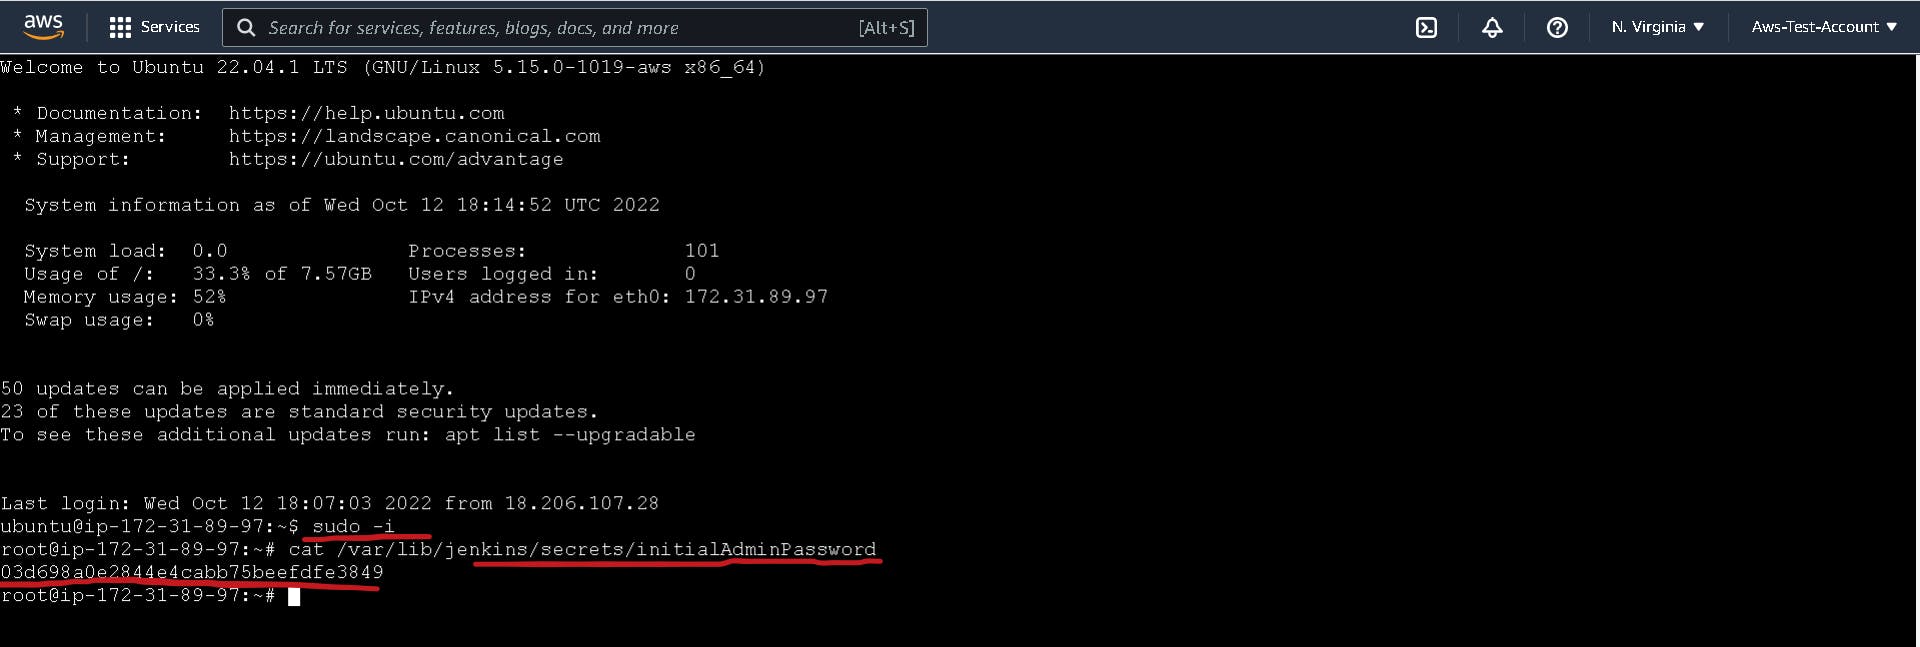
Copy the path from the browser and cat into the EC2 terminal as shown below. Be the root user first:
sudo -i
cat /var/lib/jenkins/secrets/initialAdminPassword
Copy the password and paste it into the Jenkins console. Install suggested plugins. Set your username and password for future login.
Finally, start using the jenkins.